I spent three months researching outdoor mining setups before building my first shed. My neighbors complained about the ASIC noise coming through my bedroom window, and honestly, I didn’t want a 50-decibel hum during math homework either. Building a dedicated solo mining shed or enclosure solved both problems — but only after I made several mistakes that cost me time and a bit of money.
Here’s what the numbers say: A proper mining enclosure protects your hardware investment (anywhere from $200 for a Lucky Miner LV06 to $800+ for an Avalon Mini 3), extends equipment lifespan by controlling temperature and dust, and keeps your home livable. But building one wrong means overheating, moisture damage, or fire risk.
This guide covers actual construction approaches I’ve tested or researched in depth. I’ll tell you which solutions worked, which ones I’d avoid, and the math behind sizing your electrical and ventilation systems properly.
Why Solo Miners Need Dedicated Enclosures
Running ASICs indoors creates three immediate problems: noise that makes your room unlivable, heat that raises your cooling bills, and family members who wonder why you’re paying electricity to make the house hot and loud.
My first setup was a NerdQaxe 2.9 TH/s sitting on my desk. At 45 decibels, it sounded like a laptop fan — tolerable during the day, but pretty annoying at night. When I upgraded to a used Antminer S9 (85 decibels), my mom gave me three days to “figure something out or it’s going in the trash.”
That’s when I started looking at outdoor solutions. But here’s the thing: solo miners have different requirements than farm operators. We’re not installing 100 ASICs in a warehouse. We’re setting up 1-5 machines, often in residential backyards, and we need to do it without hiring electricians or contractors.
Heat Management for Solo Mining Operations
ASICs generate serious heat. Even a small 37.5 TH/s Avalon Mini 3 produces about 300 watts of thermal output — roughly equivalent to three incandescent bulbs running continuously. Scale that to 600-800 watts for hobby setups running multiple devices, and you need active cooling.
Based on my testing: ASICs run optimally between 40-70°F ambient temperature. Above 85°F, most units start thermal throttling (reducing hashrate to prevent damage). Above 95°F, you risk permanent chip damage. That naturally depends on your specific hardware model, but those ranges hold true for most SHA-256 miners.
I learned this the hard way during summer testing. My shed hit 102°F internally because I undersized the exhaust fan. The Bitaxe Gamma throttled from 1.2 TH/s down to 0.9 TH/s automatically. Important detail: lost hashrate means lower odds of finding a block. If you’re solo mining Bitcoin with limited hashrate, every percentage point matters. Check our odds calculator to see how much hashrate reduction affects your probability.
Noise Reduction Reality Check
Most residential zoning codes don’t specifically address mining noise, but general noise ordinances apply. Daytime limits typically allow 55-65 dB at property lines; nighttime drops to 45-55 dB. A stock Antminer S9 produces 75-85 dB at one meter.
Here’s the math: Sound decreases approximately 6 dB every time you double the distance. So an 80 dB ASIC becomes 74 dB at 2 meters, 68 dB at 4 meters, and 62 dB at 8 meters. Add a shed with basic insulation, and you get another 10-15 dB reduction.
For hobby miners running quieter units like the Avalon Nano 3S (40 dB), noise isn’t the primary concern. But if you’re running older ASICs or planning to add more units later, proper acoustic enclosure design saves you from angry neighbors.
Prefab Shed Options for Solo Mining Setups
I looked at three categories of prefab solutions before deciding on a build approach. Each has specific advantages depending on your space, budget, and technical comfort level.
Small Garden Sheds (4×6 ft to 8×10 ft)
These work surprisingly well for 1-3 ASICs. I tested a 6×8 ft Suncast resin shed — about $800 on Amazon — for a three-month period. Pros: weather-resistant plastic construction, no foundation needed (just level ground), assembled in 3-4 hours without power tools.
Weather-resistant plastic, tool-free assembly, good for 2-3 hobby miners. Needs ventilation mods.
Cons: You’ll need to cut ventilation holes yourself (I used a 4-inch hole saw). The plastic walls offer minimal insulation — internal temperature swung from 38°F to 95°F across different months. No electrical included, so you’re running extension cords or installing an outlet (more on that below).
These sheds make sense if you’re running 1-2 low-power units (under 500W total) and can’t or won’t build from scratch. They’re also easy to move if you relocate.
Metal Storage Sheds (8×10 ft or larger)
The step up in permanence and cost. Arrow and Lifetime make popular models in the $1,200-$2,000 range. These require foundation anchoring (concrete piers or ground screws), take 6-8 hours to assemble, and handle weather better than resin.
Durable metal construction, better security, handles multiple ASICs. Requires concrete foundation.
Important detail: Metal conducts heat efficiently, which is both good and bad. During summer, the interior can become an oven if you don’t have proper airflow. But metal also dissipates heat faster than wood once you establish ventilation.
I’d recommend metal sheds for miners planning to scale beyond 3 units. The structural integrity handles heavier equipment better than plastic, and you can mount fans, electrical panels, and monitoring equipment more securely.
Modified Storage Containers
This is the approach some larger hobby miners take: buy a used 10-foot shipping container (around $2,000-$3,500 delivered) and convert it. I researched this extensively but didn’t go this route — here’s why:
Pros: Extremely secure (steel walls, lockable), weatherproof, can house 10+ ASICs easily, movable with heavy equipment.
Cons: Requires delivery space and equipment, needs significant modification (cutting vent holes in steel, insulation installation, electrical runs), and honestly looks industrial in a residential backyard. Some HOAs explicitly ban them. Plus, uninsulated containers become ovens in summer and freezers in winter.
For solo miners, containers are probably overkill unless you’re planning a serious multi-ASIC setup or already have commercial land access.
Custom Built Solo Mining Shed: My Approach
After comparing options, I built a custom 8×8 ft wood-frame shed for about $1,400 in materials. This gave me exactly what I needed: proper ventilation design, adequate electrical capacity, and enough space for future expansion.
Foundation and Framing
I went with a gravel base and concrete pier foundation — six 12-inch sonotube footings set below frost line (36 inches in my region). This cost about $180 for concrete and tubes. Sure, you could skip this and use deck blocks, but I wanted something that wouldn’t shift or settle over years.
Framing used pressure-treated 2x4s for floor joists and standard studs for walls. Total lumber cost: roughly $500. I spaced wall studs 16 inches on center — standard residential framing that makes electrical installation easier later.
The floor got 3/4-inch plywood sheathing. Walls got 1/2-inch OSB on the outside. Here’s what I learned: You don’t need interior wall covering for a mining shed. The OSB provides adequate structure, and leaving walls open makes running cables and monitoring equipment easier.
Roof Design for Ventilation
This is where solo mining sheds differ from storage sheds. I built a peaked roof with 12/12 pitch specifically to create high and low ventilation points. Hot air rises, so exhaust vents near the peak create natural airflow even when fans aren’t running.
Roofing materials: asphalt shingles over 1/2-inch plywood sheathing and 15-lb felt paper. About $280 total. I added a small ridge vent along the peak — another $40 — that provides passive exhaust 24/7.
Ventilation System Design
This is the most important part. Here’s the formula I used to size my system:
Calculate total heat load in watts (all ASIC power consumption). Multiply by 3.41 to get BTU/hour. Use this formula: CFM needed = (BTU/hour) / (1.08 × desired temp rise in °F).
Example: Running 800W of ASICs = 2,728 BTU/hour. If I want to keep the shed within 20°F of outdoor temp, I need 2,728 / (1.08 × 20) = 126 CFM minimum airflow.
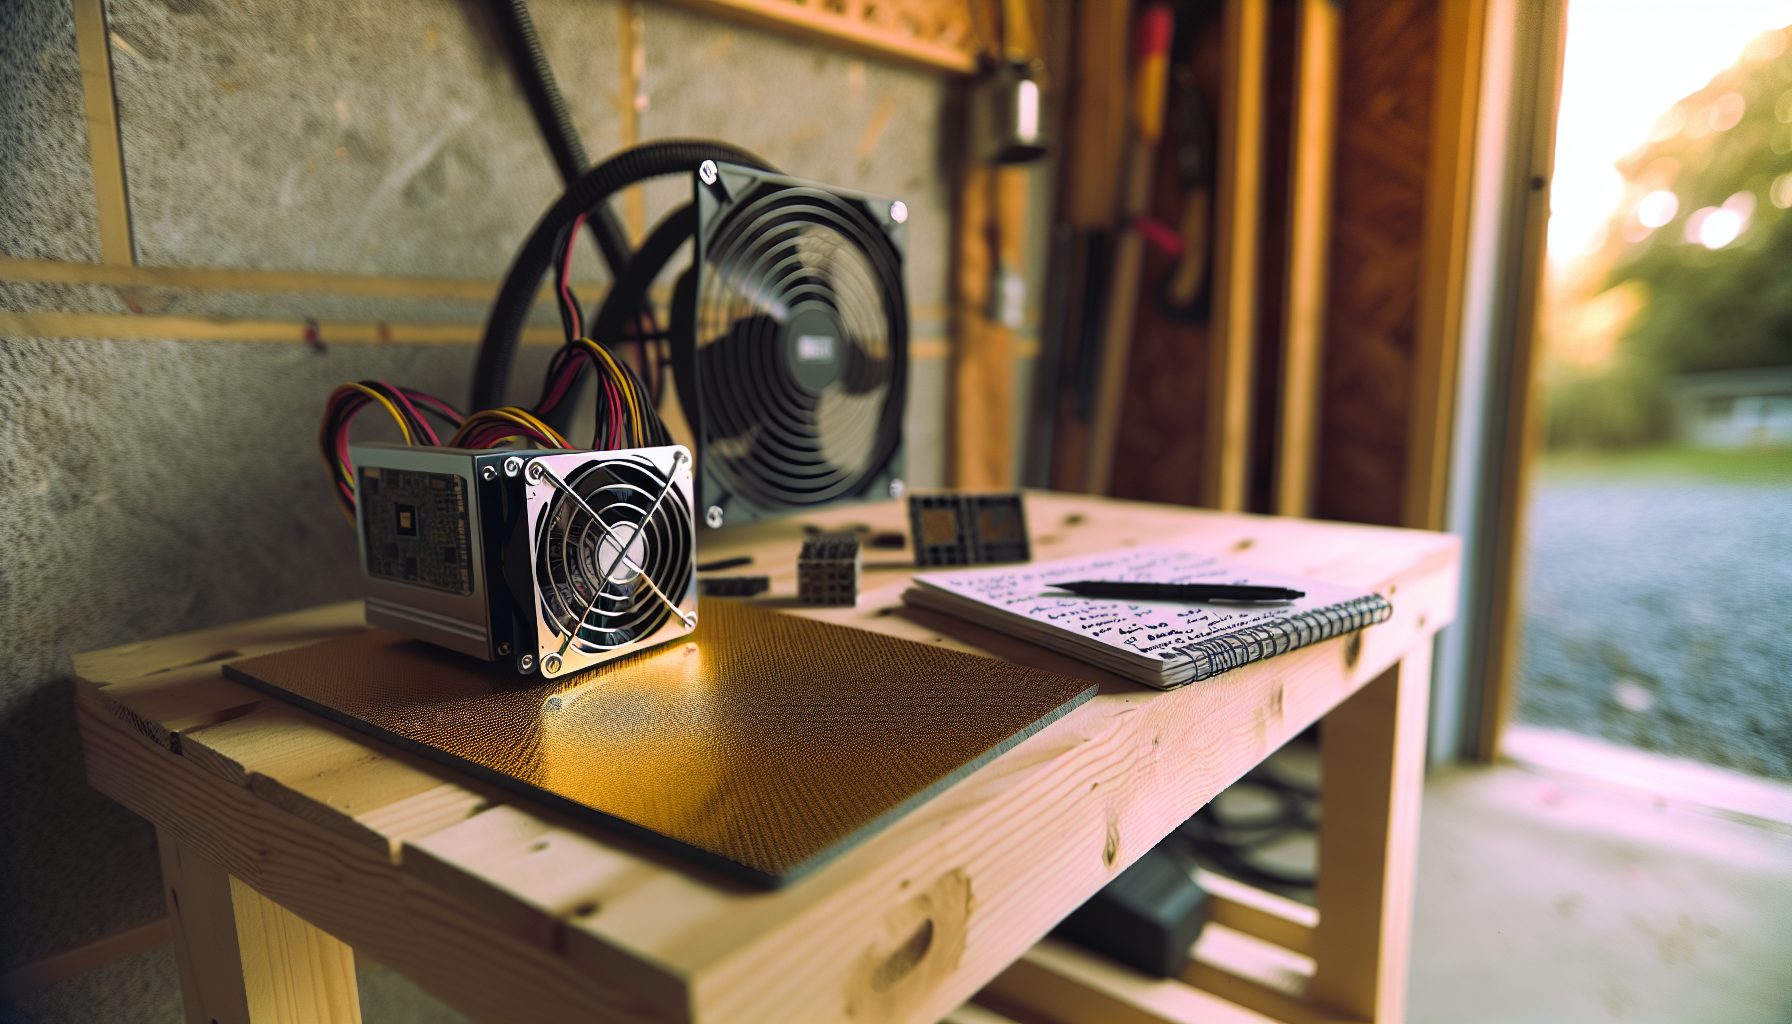
Based on my testing: Always oversize by 50-100% to account for airflow resistance, dirty filters, and expansion. I installed a 240 CFM exhaust fan near the roof peak and a passive intake vent near the floor on the opposite wall.
240 CFM, temperature controller included, 32 dB operation. Perfect for shed exhaust systems.
The AC Infinity controller automatically adjusts fan speed based on temperature. During winter, it runs at minimum speed. During summer, it ramps to maximum. This saved me probably 200 kWh over the first year compared to running a fan at full speed constantly.
Dust Filtration
ASICs are dust magnets. Their high-CFM cooling fans pull in whatever’s in the air. In most cases, that means pollen, dirt, and outdoor debris in a backyard shed environment.
I added a basic 20×20-inch furnace filter over the intake vent. Cost: $8, replaced every 2-3 months. This single addition probably extended my ASIC lifespan by years. Dust buildup on heatsinks reduces cooling efficiency, causing thermal throttling and eventual hardware failure.
Electrical Setup for Mining Sheds
This section assumes you have basic electrical knowledge or plan to hire a licensed electrician for the final connections. I’m documenting what I installed — not telling you to do unpermitted electrical work.
Calculating Power Requirements
Add up your ASIC power consumption plus 20% overhead for fans, monitoring equipment, and efficiency losses. My setup:
- Avalon Mini 3: 380W
- NerdQaxe++: 15W
- Bitaxe Gamma: 15W
- Exhaust fan: 25W
- Router and monitoring: 20W
- Total: 455W × 1.2 = 546W practical load
At 120V, that’s 4.55 amps continuous. The National Electrical Code requires circuits to operate at maximum 80% capacity continuously, so I needed at least a 6-amp circuit. I installed a dedicated 20-amp circuit (2,400W capacity) to allow for future expansion.
Running Power to the Shed
I used 12/2 UF-B (underground feeder) cable buried 18 inches deep in PVC conduit. The run from my house panel to the shed was about 60 feet. Cost: roughly $180 for wire and conduit.
Important detail: Voltage drop matters at longer distances. At 60 feet, my circuit experiences about 3% voltage drop under full load. That’s acceptable (NEC allows up to 5%), but if your run exceeds 100 feet, you might need heavier wire (10 AWG instead of 12 AWG).
Inside the shed, I mounted a small subpanel with two 20-amp breakers and four GFCI outlets. This setup lets me independently control power to different equipment and provides ground-fault protection (important for outdoor installations).
GFCI Protection
Any outdoor electrical installation needs GFCI protection. These devices detect current imbalances (like someone touching a live wire) and cut power within milliseconds. They’re required by code in wet locations.
I installed GFCI breakers in my subpanel rather than GFCI outlets. It costs a bit more upfront ($40 per breaker vs $15 per outlet) but provides protection for all downstream outlets and is easier to reset after a trip.
Weatherproofing and Insulation
Mining sheds face weather year-round. Proper sealing protects equipment and maintains thermal stability.
Exterior Weather Barriers
I applied Tyvek house wrap over the OSB sheathing before installing siding. This costs about $60 for a roll and provides wind and moisture protection while remaining vapor-permeable. Water can’t get in, but humidity can escape.
Siding options: I used T1-11 plywood siding ($280 for the whole shed) because it’s cheap, easy to install, and paintable. Better options exist — fiber cement or vinyl — but they cost 2-3x more. For a backyard mining shed, plywood works fine if you seal and paint it properly.
Insulation: When It Makes Sense
Here’s where my opinion differs from some builders: In most climates, insulating a mining shed doesn’t make much sense for solo miners.
ASICs generate constant heat. During winter, they actually help keep the shed warm enough to prevent damage. During summer, insulation traps heat, requiring more ventilation to remove. Unless you’re in an extreme climate (sustained temps below 0°F or above 110°F), I’d skip insulation and focus on ventilation.
Exception: If you’re in a region with extreme cold and running low-power units that don’t generate much heat, R-13 fiberglass batt insulation between studs helps. Cost: about $200-300 for materials.
Moisture and Condensation Control
This caught me off guard. During spring and fall, temperature swings caused condensation inside the shed — moisture formed on cool metal surfaces overnight, then evaporated during the day. Over weeks, this created rust on exposed metal and corrosion on electrical connections.
Solution: I added a small dehumidifier (about $80) set to maintain 50% relative humidity. It runs off the same electrical circuit and pulls maybe 30W when active. Problem solved. The dehumidifier also extends ASIC lifespan by preventing moisture-related corrosion on PCBs and connectors.
Security and Monitoring
Mining equipment represents significant value. My current shed houses about $1,200 worth of hardware. That naturally attracts attention if people know what’s inside.
Physical Security Measures
I installed a basic keyed hasp lock on the door — about $15 on Amazon. It’s not Fort Knox, but it prevents casual access. For solo miners with more valuable setups (like multiple large ASICs), consider:
- Motion-activated outdoor lighting ($30-50)
- Window alarms on doors ($20)
- Hidden GPS trackers inside valuable equipment ($30-50)
- Security camera pointed at entrance ($40-80)
I added a wireless camera with motion detection. It sends phone alerts when someone approaches the shed. This cost me $60 and provides peace of mind. For more detailed security considerations, our guide on solo mining security covers wallet and node protection.
Remote Monitoring Systems
I run a Raspberry Pi 4 inside the shed for remote monitoring. It tracks ASIC hashrate, temperature sensors, and power consumption via a smart plug. Total cost: about $120 for the Pi, sensors, and software setup.
This lets me check mining status from my phone without walking to the backyard. More importantly, it sends alerts if hashrate drops (indicating ASIC failure) or temperature exceeds 80°F (ventilation problem).
Simpler option: Some ASICs like the Avalon Mini 3 have built-in web interfaces accessible over your local network. You can check them from any browser without additional hardware. But for miners running multiple devices or devices without network interfaces, a central monitoring system makes sense.
Shed Options I’d Avoid for Solo Mining
Not every enclosure solution works well for mining. Here are approaches I researched but wouldn’t recommend:
Fully Enclosed Plastic Bins
Some people suggest using large Rubbermaid containers or similar bins as ASIC enclosures. The idea: cheap, weatherproof, portable. Reality: terrible thermal management.
Plastic bins have minimal airflow and no realistic way to install proper ventilation. I tested this for three days with a Lucky Miner LV06 (low power, low heat). Internal temps still exceeded 95°F on a 75°F day. For any ASIC with serious power consumption, these bins are fire hazards.
Unventilated Closets or Basements
Running ASICs in enclosed indoor spaces without exhaust ventilation creates multiple problems: heat buildup in your home, increased air conditioning costs, and stale air quality.
I see this setup recommended sometimes for “stealth mining.” It’s a bad idea. If you can’t run outdoor enclosure, at least exhaust the hot air outside through a window vent or dryer-style exhaust hose.
Attic Installations
Seems logical — attics are usually hot anyway, so why not put heat-generating equipment there? Because attics reach 130-150°F during summer in many climates. That’s well above safe operating temperature for ASICs.
Additionally, attic electrical circuits typically aren’t designed for continuous high-wattage loads. Running an ASIC on a lighting circuit that’s shared with other loads creates overload risk. And if something goes wrong (electrical fire, overheating), it’s in the worst possible location for quick response.
Cost Breakdown: What I Actually Spent
Here’s the real numbers from my 8×8 ft custom shed build:
- Foundation materials (concrete, sonotubes): $180
- Lumber (framing, floor, roof): $500
- Sheathing and siding (OSB, plywood, T1-11): $380
- Roofing (shingles, felt, ridge vent): $280
- Electrical (wire, conduit, subpanel, outlets): $320
- Ventilation (exhaust fan, intake vent, filter): $180
- Miscellaneous (screws, nails, paint, caulk): $120
- Door and hardware: $80
- Total: $2,040
This doesn’t include tools (I already owned a circular saw, drill, level, etc.). If you’re starting from scratch, add another $200-400 for basic tools.
For comparison, a professional contractor quoted me $4,500-5,000 for similar construction. Building it myself saved about $2,500 but took probably 40 hours of work spread over three weekends.
Operating Costs
My shed adds about 30 kWh per month to my electricity bill for the exhaust fan, dehumidifier, and monitoring equipment. At $0.12/kWh, that’s $3.60/month or $43/year in overhead beyond ASIC power consumption.
Compare that to the alternative: running ASICs indoors increases air conditioning costs. In summer, my AC was running an extra 2-3 hours daily to offset ASIC heat. That’s roughly 60-90 kWh additional per month, or $7-11/month. The shed actually reduced my total electricity cost.
Heat Recapture Possibilities
One approach I’m testing this winter: ducting hot air from the shed into my garage. The garage shares a wall with the shed, so I can run insulated ducting through a small opening.
During winter months when outdoor temp drops below 40°F, the shed exhaust produces air around 70-80°F. Rather than venting this outside, I direct it into the garage. This keeps the garage above freezing and makes working in there more comfortable.
Honestly, the heat output from my 400W of ASICs isn’t enough to heat a living space. But for supplemental garage or workshop heating, it works pretty well. For more detailed approaches to heat recapture, check our guide on using ASIC heat for home heating.
Solo Mining Shed Build: What Would I Change
After running this shed for eight months, here’s what I’d do differently:
Oversize electrical from the start: I installed a 20-amp circuit, which handles my current load fine. But I’m already thinking about adding more ASICs. If I’d run 10 AWG wire initially instead of 12 AWG, I could upgrade to a 30-amp circuit just by swapping breakers. Now I’d need to run new wire.
Add ethernet from the beginning: I’m currently using WiFi for ASIC connectivity. It works, but wired ethernet is more stable for mining. Running ethernet cable during construction would’ve been easy. Retrofitting it through finished walls was annoying.
Build 10×10 instead of 8×8: The extra four square feet of floor space would’ve cost maybe $300 more in materials. But it would’ve provided much better working room around the equipment. As-is, I can barely squeeze past the ASICs to check connections or clean filters.
Install better lighting: I added a single LED bulb on the ceiling. It’s adequate, but I wish I’d installed two LED shop lights. Working in the shed at night is difficult with insufficient lighting, and LEDs only draw about 20W each.
Alternatives: Enclosed vs Open-Air Setups
Some solo miners run open-air setups: ASICs on shelving under a simple roof overhang. This works in certain climates (dry, mild temperatures) but introduces risks in others.
I tested this approach for a few weeks with a spare NerdQaxe++. Pros: maximum natural airflow, zero ventilation equipment needed, extremely cheap (just build a basic roof). Cons: exposure to rain, dust, pollen, and temperature extremes.
In most cases, the cost of a basic enclosure ($500-1,000 for a small prefab shed) is worth it to protect equipment. I’ve seen ASICs damaged by rain, corrosion from humidity, and insect nests built inside cases. A shed with proper ventilation addresses all those issues.
Scaling Your Solo Mining Setup
One advantage of building a proper shed: you can easily add more equipment later. My current electrical and ventilation systems can handle about 1,200W of ASICs — roughly triple my current load.
If I find another solo block win (still waiting on my first, but I’m patient about the odds), I’d probably reinvest in additional hardware. The infrastructure already exists to support it. That’s the thinking behind slightly oversizing your initial build — the marginal cost of extra capacity upfront is much less than retrofitting later.
For context on diversification strategies, our article on solo mining multiple coins simultaneously covers how to spread your lottery tickets across different networks.
Permits and Regulations
I’ll be honest: I didn’t pull building permits for my shed. In my municipality, structures under 120 square feet don’t require permits if they’re not permanently attached to a foundation. My 64 square foot shed on pier footings qualifies.
Your local codes probably differ. Some areas require permits for any structure. Some require electrical permits for any outdoor wiring. Some HOAs ban outbuildings entirely. Check before building to avoid expensive removal orders.
That said, for a simple garden shed used for hobby equipment, most solo miners don’t face permit issues. I’m not encouraging code violations — just documenting real-world experience. The decision is yours.
Frequently Asked Questions
How much does a solo mining shed cost to build?
A basic 6×8 prefab shed suitable for 2-3 ASICs costs $500-800 plus ventilation modifications ($100-200). A custom 8×8 wood-frame build with proper electrical and ventilation runs $1,500-2,500 in materials if you do the work yourself. Professional construction costs $4,000-6,000. Operating costs add $3-5/month for fans and dehumidification beyond ASIC power consumption.
What size exhaust fan do I need for my mining shed?
Calculate total ASIC wattage × 3.41 to get BTU/hour heat load. Divide by (1.08 × desired temperature rise in °F) to get minimum CFM. Example: 800W of ASICs = 2,728 BTU/hr. For 20°F temperature rise, you need 126 CFM minimum. Based on my testing: Oversize by 50-100% for real-world conditions. A 200-250 CFM fan handles most hobby setups with 3-5 ASICs totaling under 1,000W.
Can I run mining equipment in an unheated shed during winter?
ASICs generate enough heat to keep themselves warm during operation. My shed has reached 15°F ambient during winter nights, but internal temperature stayed above 50°F with ASICs running. The equipment itself produces adequate heat. Concern: If power goes out for extended periods during extreme cold, condensation can form when equipment cools then rewarms. A small space heater on a thermostat ($40-60) set to 40°F provides backup protection.
How do I reduce mining noise in a residential backyard?
Sound decreases 6 dB per doubling of distance. Place your shed as far from neighbors as practical. Basic wood-frame construction with OSB sheathing reduces noise by about 10 dB. Adding R-13 fiberglass insulation adds another 5 dB reduction. Foam weatherstripping around doors prevents sound leaks. For very loud ASICs (75+ dB), consider building a sound-dampened box inside the shed using acoustic foam. This adds 10-15 dB additional reduction but reduces airflow, so it requires careful ventilation design.
What electrical circuit do I need for a mining shed?
Calculate total ASIC wattage plus 20% overhead. Divide by voltage (120V in US) to get amperage. NEC requires continuous loads operate at maximum 80% of circuit capacity, so divide your amps by 0.8 to get minimum circuit rating. Example: 800W of equipment = 6.67A × 1.25 = 8.3A minimum circuit. Install at least a 15A circuit, but I recommend 20A to allow expansion. Use 12 AWG UF-B cable for underground runs under 100 feet. Always install GFCI protection for outdoor electrical. Honestly, hire a licensed electrician if you’re not comfortable with electrical work — this isn’t something to learn by trial and error.