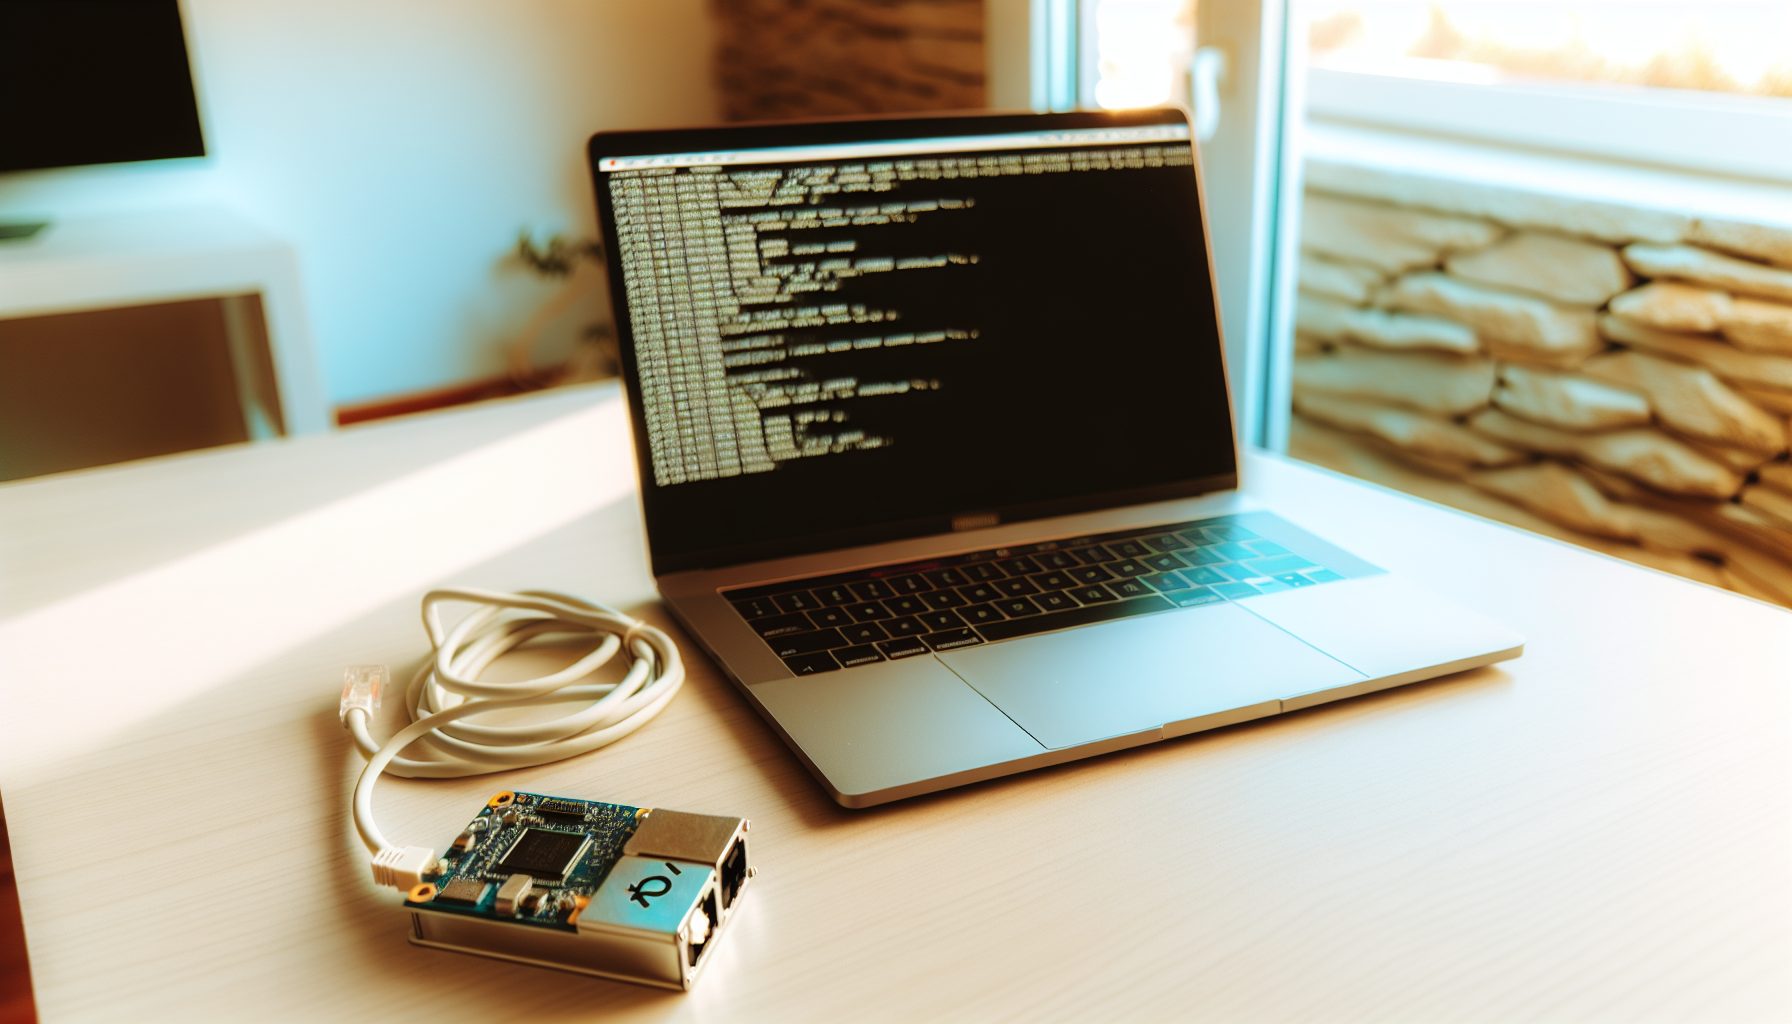
You Want Full Control Over Your Mining Setup, But BFGMiner Looks Complicated
Here’s the problem: You’ve decided to take solo mining seriously. Maybe you’re running a Bitaxe, maybe you’ve got an old ASIC in the garage, or perhaps you’re testing GPU mining on lower difficulty coins. You know pool mining means giving up a cut of your potential block reward, and you’re ready to go solo.
Then you open BFGMiner’s documentation.
The command line options scroll for pages. Stratum configurations, RPC connections, device selection flags, API parameters. You’re not sure if you need getwork or stratum, whether to connect directly to a node or use a proxy, and why some guides mention mining.set_difficulty while others don’t.
Let me break this down: BFGMiner is actually one of the most capable miners for solo work, but the documentation assumes you already know what you’re doing. After testing BFGMiner across multiple setups — from a NerdQAxe++ connected to my Bitcoin node to GPU mining Monero through a local daemon — I can tell you the setup is more straightforward than it looks.
This guide walks through both methods: connecting through a stratum proxy like CKPool’s solo.ckpool.org, and connecting directly to your own full node. Both have their place.
Understanding BFGMiner’s Architecture for Solo Mining
BFGMiner isn’t CGMiner with a different name. While they share ancestry, BFGMiner took a different path — focusing on modular driver support and more granular device control. For solo miners, this matters.
Here’s what the numbers say: BFGMiner supports more device types out of the box than almost any other miner. ASICs, FPGAs, GPUs (through OpenCL), even USB stick miners. The same binary can drive a 1 TH/s USB miner or communicate with a full node running on localhost.
The architecture works like this:
- Device drivers: Communicate with your actual hardware (ASIC chips, GPU OpenCL, USB controllers)
- Work generation: Requests work from either a stratum server or RPC node
- Share submission: Sends completed shares back through the same channel
- API server: Optional monitoring interface (usually port 4028)
For solo mining specifically, you have two valid approaches. Using a stratum proxy means someone else runs the node infrastructure, you just point BFGMiner at their server. Running your own full node means you control everything, but you’re responsible for node maintenance and blockchain sync.
I’ll cover both. The stratum method gets you mining in five minutes. The full node method takes longer but gives you complete independence.
Why BFGMiner Instead of CGMiner for Solo Work?
I’ve written about CGMiner for solo mining before. Both work. Here’s the practical difference:
BFGMiner has better support for newer device types and includes features like dynamic clocking and per-device configuration without recompiling. If you’re running something like a GekkoScience Compac F or similar USB miner, BFGMiner usually has better driver support.
CGMiner is leaner and sometimes slightly more efficient on older ASICs, but the development pace is slower. For pure SHA-256 ASIC solo mining through stratum, honestly? Either works fine.
The real advantage shows up when you’re mixing device types or need the built-in RPC support. BFGMiner’s getwork implementation is more robust for direct node connections.
Setting Up BFGMiner with Stratum Proxy (The Fast Method)
This is how most people start. You’re solo mining, but the node infrastructure is handled by a pool operator who takes zero fees and just relays your work. Solo mining pools like CKPool’s solo.ckpool.org provide this service for Bitcoin.
Important detail: When you mine through a solo stratum pool, you still get 100% of the block reward if you find a block. The pool operator doesn’t take a cut — they’re providing infrastructure out of goodwill or to demonstrate their pool software. Your wallet address is encoded in the work, so the coinbase transaction pays directly to you.
Step 1: Install BFGMiner
On Linux (Ubuntu/Debian):
sudo apt-get update

sudo apt-get install build-essential autoconf automake libtool pkg-config libcurl4-openssl-dev libjansson-dev uthash-dev libncursesw5-dev libudev-dev libusb-1.0-0-dev libevent-dev libmicrohttpd-dev hidapi

git clone https://github.com/luke-jr/bfgminer.git

cd bfgminer

./autogen.sh

./configure

make
On Windows, download the pre-compiled binary from the official repository. Extract it somewhere permanent (not your Downloads folder — you’ll be running this regularly).
For Raspberry Pi or ARM devices running something like a FutureBit Apollo, the Linux method works but may take 20-30 minutes to compile on slower hardware.
Step 2: Basic Stratum Configuration
Here’s the command structure for Bitcoin solo mining through CKPool:
./bfgminer -o stratum+tcp://solo.ckpool.org:3333 -u YOURBTCADDRESS -p x
Replace YOURBTCADDRESS with your actual Bitcoin wallet address. Make absolutely sure this is correct — if you find a block with a typo in your address, those coins are gone forever. At current BTC price: $66,077, that’s a mistake you don’t want to make.
The password field (-p) doesn’t matter for CKPool’s solo mining — use x or anything else. Some stratum implementations use it for worker identification or difficulty hints, but solo.ckpool.org ignores it.
If you’re running an ASIC that BFGMiner doesn’t auto-detect, you’ll need to specify the device driver:
./bfgminer -S antminer:all -o stratum+tcp://solo.ckpool.org:3333 -u YOURBTCADDRESS -p x
The -S flag tells BFGMiner which driver to load. For USB stick miners:
./bfgminer -S compac:all -o stratum+tcp://solo.ckpool.org:3333 -u YOURBTCADDRESS -p x
Stratum Ports and Difficulty
CKPool provides multiple ports with different starting difficulties:
- Port 3333: Standard difficulty (suitable for most hardware)
- Port 3334: Higher starting difficulty (for large miners, 100+ TH/s)
- Port 3335: Lower starting difficulty (for weak hardware under 1 TH/s)
The stratum protocol adjusts your difficulty automatically based on your hashrate, but starting at the right level reduces initial rejected shares. If you’re running something small like a NerdMiner (yes, BFGMiner is overkill for that, but technically possible), use port 3335.
For context: My Bitaxe Supra running at 600 GH/s works fine on port 3333. An Antminer S21 pushing 200 TH/s should probably use 3334.
Connecting BFGMiner Directly to Your Full Node
This is the proper solo mining setup. You run a full Bitcoin node (or whatever coin you’re mining), BFGMiner connects directly via RPC, and you have zero dependencies on external services.
The tradeoff: You need to sync and maintain the blockchain yourself. For Bitcoin, that’s currently around 600 GB of data and growing. Your node needs to stay synced or you’re wasting hashpower mining on stale work.
But here’s what you gain: Complete independence, full verification of all transactions, no trust in third parties, and the satisfaction of supporting the network properly. If you’re serious about solo mining, this is the path.
Setting Up Bitcoin Core for Mining
First, install and sync Bitcoin Core. I’m assuming you’ve already done this — if not, check that guide first. The initial sync takes days on decent hardware.
Once synced, you need to enable the RPC server. Edit your bitcoin.conf file (usually in ~/.bitcoin/ on Linux or %APPDATA%Bitcoin on Windows):
server=1

rpcuser=yourusername

rpcpassword=yourpassword

rpcallowip=127.0.0.1

rpcport=8332
Choose a strong password. This RPC interface has full control over your node, including wallet functions. If someone compromises it, they can steal your coins.
Restart Bitcoin Core after editing the config. Verify the RPC server is responding:
bitcoin-cli getblockchaininfo
You should see current sync status, block height, chain work, etc. If you get a connection error, check your bitcoin.conf syntax and firewall settings.
BFGMiner Configuration for RPC Mining
The command structure looks different than stratum:
./bfgminer -o http://127.0.0.1:8332 -O yourusername:yourpassword --generate-to YOURBTCADDRESS
The -o flag points to your RPC server (localhost in this case). The -O flag (capital O) provides credentials in username:password format. The –generate-to flag specifies your payout address for the coinbase transaction.
Important: The wallet address must exist in your Bitcoin Core wallet, or you need to use the legacy address generation. Modern Bitcoin Core uses descriptor wallets that handle this differently. Verify your address is recognized:
bitcoin-cli getaddressinfo YOURBTCADDRESS
If ismine returns false, you’ll need to import the address or generate a new one through Bitcoin Core’s console.
Advanced RPC Options
BFGMiner supports several RPC-specific flags worth knowing:
--coinbase-addr YOURBTCADDRESS — Alternative to –generate-to, sometimes required for certain node configurations
--coinbase-sig "TEXT" — Add custom text to your block’s coinbase (limited to 100 bytes, appears on-chain forever)
--no-getwork — Disable getwork support (use if your node only supports getblocktemplate)
--no-gbt — Force getwork mode (older protocol, usually not needed)
The getblocktemplate vs getwork distinction basically doesn’t matter anymore. Modern Bitcoin Core supports both, BFGMiner auto-negotiates, and it just works. Only mention it because you’ll see it in old forum posts.
Multi-Algorithm Setup: Mining Scrypt, X11, and Other Coins
BFGMiner wasn’t designed only for Bitcoin. If you’re solo mining Scrypt coins like Litecoin or Dogecoin, the configuration is nearly identical.
For Litecoin through your own node:
First, install and sync Litecoin Core. Configure litecoin.conf similar to bitcoin.conf:
server=1

rpcuser=ltcuser

rpcpassword=ltcpassword

rpcallowip=127.0.0.1

rpcport=9332
Then connect BFGMiner with the scrypt algorithm flag:
./bfgminer --scrypt -o http://127.0.0.1:9332 -O ltcuser:ltcpassword --generate-to YOURLTCADDRESS
The –scrypt flag is critical. Without it, BFGMiner tries SHA-256 hashing and your Scrypt ASIC reports zero hashrate or fails to initialize.
If you’re running an Antminer L7 or similar Scrypt ASIC, you’ll also need:
./bfgminer --scrypt -S antminer:all -o http://127.0.0.1:9332 -O ltcuser:ltcpassword --generate-to YOURLTCADDRESS
GPU Mining Alternative Algorithms
BFGMiner’s OpenCL support works for GPU mining, though honestly, for most GPU-minable coins you’re better off with algorithm-specific miners. The performance gap is significant.
That said, for testing or educational purposes, here’s how to enable GPU devices:
./bfgminer --scrypt -S opencl:auto -o stratum+tcp://yourpool:port -u address -p x
The opencl:auto flag tells BFGMiner to detect all OpenCL-capable GPUs. You can specify individual devices with opencl:0, opencl:1, etc.
For actual GPU solo mining, I’d recommend algorithm-specific miners. For Ethereum Classic, use TeamRedMiner or lolMiner. For Kaspa, use native miners even if you’re on GPU. BFGMiner’s GPU support exists but isn’t competitive.
Troubleshooting Common BFGMiner Solo Mining Issues
After running BFGMiner in various configurations, I’ve hit most of the common problems. Here’s what actually works:
No Devices Detected
BFGMiner starts but shows “No devices detected” or similar. Usually a driver issue.
First, list available device drivers:
./bfgminer --help | grep "Scrypt algorithm"
Or for SHA-256:
./bfgminer -n
The -n flag scans for devices without starting mining. If your hardware doesn’t appear, you might need:
- USB permissions (add your user to dialout group on Linux:
sudo usermod -a -G dialout $USER) - Kernel modules loaded (some USB miners need cp210x or similar drivers)
- Zadig driver installation (Windows only, for USB ASICs)
- Explicit driver specification with -S flag
For USB stick miners specifically, check dmesg output on Linux to see if the device is recognized at the USB level. If the OS doesn’t see it, BFGMiner definitely won’t.
RPC Connection Failures
“HTTP request failed: couldn’t connect to host” or similar errors when trying to connect to your node.
Check these in order:
Is your node actually running? Sounds obvious, but verify with bitcoin-cli getblockchaininfo from a terminal.
Is the RPC server enabled? Check bitcoin.conf has server=1 and restart Bitcoin Core after any config changes.
Firewall blocking the connection? Test with curl: curl --user yourusername:yourpassword --data-binary '{"jsonrpc":"1.0","id":"test","method":"getblockchaininfo","params":[]}' -H 'content-type: text/plain;' http://127.0.0.1:8332/
If curl works but BFGMiner doesn’t, you likely have a credential mismatch. Double-check username and password exactly match bitcoin.conf.
High Reject Rate or No Accepted Shares
BFGMiner shows hashrate but shares keep getting rejected. A few possibilities:
Stale work: Your node isn’t fully synced or your network latency is too high. For solo mining through CKPool, network latency over 100ms starts causing problems. Local node connections should have single-digit ms latency.
Wrong difficulty: The stratum server is assigning difficulty too high or too low for your hashrate. Usually auto-adjusts within a few minutes, but if it doesn’t, try a different port.
Hardware errors: Check your ASIC’s temperature and error rate. If you see HW errors in BFGMiner’s interface (press ‘D’ for device stats), your miner is overclocked or overheating. For noise reduction modifications, make sure you didn’t compromise cooling too much.
BFGMiner Crashes or Hangs
Intermittent crashes, especially with USB devices, usually trace back to power issues. USB stick miners can pull more current than a standard USB port provides. Use a powered hub.
For larger setups with multiple devices, verify your power infrastructure can handle the load. A 1500W ASIC on a 15A circuit that’s also powering your computer and monitors will cause problems.
On Windows, driver conflicts sometimes cause hangs. Run BFGMiner in a dedicated terminal and watch for error messages before the crash.
Optimizing BFGMiner Performance for Solo Mining
Basic functionality is one thing. Squeezing maximum efficiency is another.
Scan Time and Intensity Settings
The –scan-time flag controls how frequently BFGMiner requests new work from your node or stratum server. Default is 60 seconds for RPC, variable for stratum.
For solo mining with a local node, I typically use:
--scan-time 15
This reduces the chance of working on stale blocks if a new block arrives on the network. The downside is slightly higher CPU usage on your node due to more frequent getwork requests, but on any modern system that’s negligible.
For stratum connections, the server controls this via mining.notify messages, so –scan-time is mostly ignored.
Intensity settings (–intensity flag) matter primarily for GPU mining and don’t apply to most ASIC devices. If you are GPU mining, start at lower intensity and increase until hashrate stops improving or system becomes unstable.
API and Monitoring
BFGMiner includes a built-in API server for monitoring. Enable it with:
--api-listen --api-allow W:127.0.0.1
This opens port 4028 (by default) for monitoring tools. You can query it with netcat:
echo "summary" | nc 127.0.0.1 4028
Returns JSON with current hashrate, accepted/rejected shares, hardware errors, temperature (if available), etc. Useful for building custom monitoring dashboards or integrating with home automation systems.
The W: prefix in api-allow grants write access from that IP. If you only want read access (safer), use –api-allow 127.0.0.1 without the W: prefix.
Benchmarking and Baseline Establishment
Before you start solo mining for real, establish a baseline with pool mining. Point your BFGMiner setup at a regular pool (not solo) for 24 hours and record:
- Average hashrate
- Hardware error rate
- Reject percentage
- Temperature range
- Power consumption (use a kill-a-watt meter)
Then switch to solo mining with identical hardware settings. Your hashrate should be the same. If solo mining shows lower hashrate, something’s wrong with your configuration — probably network latency or node sync issues.
This baseline also gives you realistic efficiency numbers. If you’re pulling 1500W for 100 TH/s, that’s 15 J/TH — decent for older hardware, terrible for modern ASICs. At $0.10/kWh, you’re spending $3.60 per day on electricity. Run those numbers against realistic solo mining probabilities before you commit.
Real Talk: Should You Actually Use BFGMiner for Solo Mining?
Here’s my honest assessment after using BFGMiner across different setups:
For SHA-256 Bitcoin mining with ASICs, BFGMiner works fine but isn’t necessarily better than alternatives. CGMiner is simpler for basic ASIC work. Most modern ASICs come with their own web interfaces and mining software that connect just fine to solo stratum pools or nodes.
Where BFGMiner shines: USB stick miners, FPGAs, multi-device setups mixing different hardware types, and situations where you need fine-grained control over individual device parameters. If you’re running a Goldshell Mini-DOGE Pro alongside a Bitaxe and a couple of USB Compac F sticks all connected to the same node, BFGMiner handles that beautifully.
For single large ASICs? Honestly, the manufacturer’s firmware usually works better and provides nicer monitoring interfaces. That Antminer S21’s web interface is more user-friendly than BFGMiner’s terminal UI.
The learning curve is real. Expect to spend a few hours getting everything configured properly the first time. The command line flags, driver specifications, and RPC setup aren’t intuitive if you’re coming from GUI mining software.
But once it’s working, it’s rock-solid. I have a Bitaxe connected through BFGMiner that’s been running for months without intervention. The same configuration just keeps working as long as the node stays synced.
Electricity Cost Reality Check
This matters more than your miner choice. Let’s do actual math:
Say you’re running an older Antminer S9 at 13.5 TH/s pulling 1300W. At $0.12/kWh, that’s $3.74 per day in electricity. Bitcoin’s current network difficulty means your odds of solving a block at 13.5 TH/s are roughly 1 in 40,000 days.
Over 110 years, you’d spend about $150,000 on electricity before finding one block (on average). The block reward is 3.125 BTC, currently $66,077 per coin. You can do that math yourself.
For context, this is why I focus on lottery-style solo mining with efficient, low-power devices. A Bitaxe at 25W costs $0.07 per day. Over that same statistical timeframe, you’re spending maybe $3,000 in electricity — still terrible odds, but at least you’re not bankrupting yourself on power bills.
The only scenarios where traditional ASIC solo mining makes economic sense: You have free or extremely cheap electricity (under $0.03/kWh), you’re mining lower-difficulty coins, or you have enough hashrate that block-finding time drops to reasonable timeframes (months rather than centuries).
Alternative Configurations Worth Considering
BFGMiner isn’t your only option, and it’s worth understanding the alternatives:
CPUMiner-Multi for Altcoins
If you’re solo mining CPU-friendly coins (yes, they still exist), cpuminer-multi supports direct RPC connections with simpler configuration. For coins like Monero using RandomX, the dedicated xmrig miner performs significantly better.
Custom Stratum Proxies
You can run your own stratum proxy locally that connects to your node, then point BFGMiner at the proxy. This gives you the convenience of stratum protocol with the independence of your own node.
The mining-proxy software handles this, though setup is honestly more complicated than just using BFGMiner’s native RPC support. Only makes sense if you’re running multiple miners and want centralized work distribution.
Direct Firmware Mining
Many modern ASICs can connect directly to nodes or solo pools through their built-in interfaces. If your hardware supports it, this is usually easier than using BFGMiner as an intermediary.
Check your ASIC’s manual — most Antminers, WhatsMiner, and similar units have “custom pool” configuration where you can enter solo.ckpool.org or your own node’s address.
A Hidden Gem: Using BFGMiner for Network Testing
Here’s something most guides don’t mention: BFGMiner is actually really good for testing node connectivity and network performance before you commit serious hashpower.
Point BFGMiner at your node with minimal hardware (even a USB miner or low-end GPU). Let it run for 24 hours and watch for:
- Connection drops or RPC timeouts
- Stale work rates
- Block update latency
If you see issues at 1 TH/s, they’ll be catastrophic at 100 TH/s. This stress-tests your node configuration with minimal electricity cost.
I actually keep a USB Compac F running on BFGMiner connected to my Bitcoin node permanently, not because I expect to mine anything, but because it validates the node is working correctly. If BFGMiner reports connection issues, I know to investigate before more serious hardware is affected.
Secure Your Winnings
Finding a solo block means receiving 3.125 BTC directly to your wallet — currently worth over $250,000. That amount should never sit on an exchange.
Two hardware wallets we recommend for solo miners:
Ledger Nano X (~$149) — Industry standard, supports BTC natively
Buy Ledger Nano X
Trezor Model T (~$179) — Open-source firmware, strong community trust
Buy Trezor Model T
Frequently Asked Questions About BFGMiner Solo Mining
Can BFGMiner mine multiple coins simultaneously?
Not really. BFGMiner itself can only mine one algorithm at a time, though you can run multiple instances with different configurations. For proper merged mining (like Litecoin/Dogecoin or Bitcoin/Namecoin), you need pool support or node configuration that handles the merged work distribution.
What you can do: Run multiple BFGMiner processes, each connected to different nodes, mining different coins. Requires multiple mining devices or GPUs. Attempting to mine two different algorithms on the same hardware simultaneously just splits hashrate and accomplishes nothing useful.
Is BFGMiner better than CGMiner for solo Bitcoin mining?
Not necessarily “better,” just different. CGMiner is simpler and often slightly more efficient for pure ASIC SHA-256 mining. BFGMiner has better device support, more configuration options, and easier multi-device management.
For a single ASIC pointed at solo.ckpool.org? Both work identically well. For managing multiple different device types or needing advanced monitoring, BFGMiner wins. The performance difference in actual mining is negligible.
What’s the minimum hashrate needed for solo mining with BFGMiner?
There’s no technical minimum — BFGMiner works at any hashrate. The practical minimum depends on which coin you’re mining and how long you’re willing to wait.
For Bitcoin, even 100 TH/s has expected block time measured in years. You’re basically playing the lottery. For lower difficulty coins, the math changes. Research the specific coin’s network difficulty and calculate your expected time to block using online calculators.
My perspective: If your expected time to block is over 5 years, you’re better off pool mining or accepting it as a lottery ticket. Don’t solo mine with the expectation of regular income at low hashrates.
Can I use BFGMiner with immersion-cooled mining setups?
Absolutely. Immersion cooling doesn’t change the software interface — BFGMiner communicates with your ASIC through the same network or USB connections. The cooling method is transparent to the mining software.
The advantage with immersion setups is you can often push higher overclocks safely, which means more hashrate for the same hardware. Just make sure your BFGMiner configuration matches whatever clock speeds you’ve set on the hardware.
Does BFGMiner work with solo mining pools like CKPool?
Yes, perfectly. That’s actually one of the easiest ways to get started with Bitcoin solo mining. CKPool’s solo.ckpool.org server speaks standard stratum protocol, which BFGMiner supports natively.
Connect with: ./bfgminer -o stratum+tcp://solo.ckpool.org:3333 -u YOURBTCADDRESS -p x
You get the convenience of not running your own node with the benefit of full block rewards if you find a block. That naturally depends on trusting CKPool’s infrastructure and accepting you’re not independently validating the blockchain.
For maximum independence, run your own node. For ease of use while starting out, CKPool works great and has a solid reputation in the Bitcoin community.