Your ASIC sounds like a jet engine taking off in your spare bedroom. The noise is driving everyone in your house insane. You’ve tried fan mods and soundproof boxes, but nothing really solves the problem. That’s when you start reading about immersion cooling — dunking your entire miner in a tank of special liquid.
Sounds extreme, right?
I spent three months researching immersion cooling before Hugo and I finally built our first setup. We wanted to run an Antminer L7 in Hugo’s bedroom without his parents losing their minds about the noise. The data shows that immersion cooling can reduce noise from 75+ dB down to around 35-40 dB — basically from “leaf blower” to “quiet conversation”.
This guide covers everything I learned the hard way so you don’t have to make the same mistakes we did.
What Is Immersion Cooling and Why Solo Miners Should Care
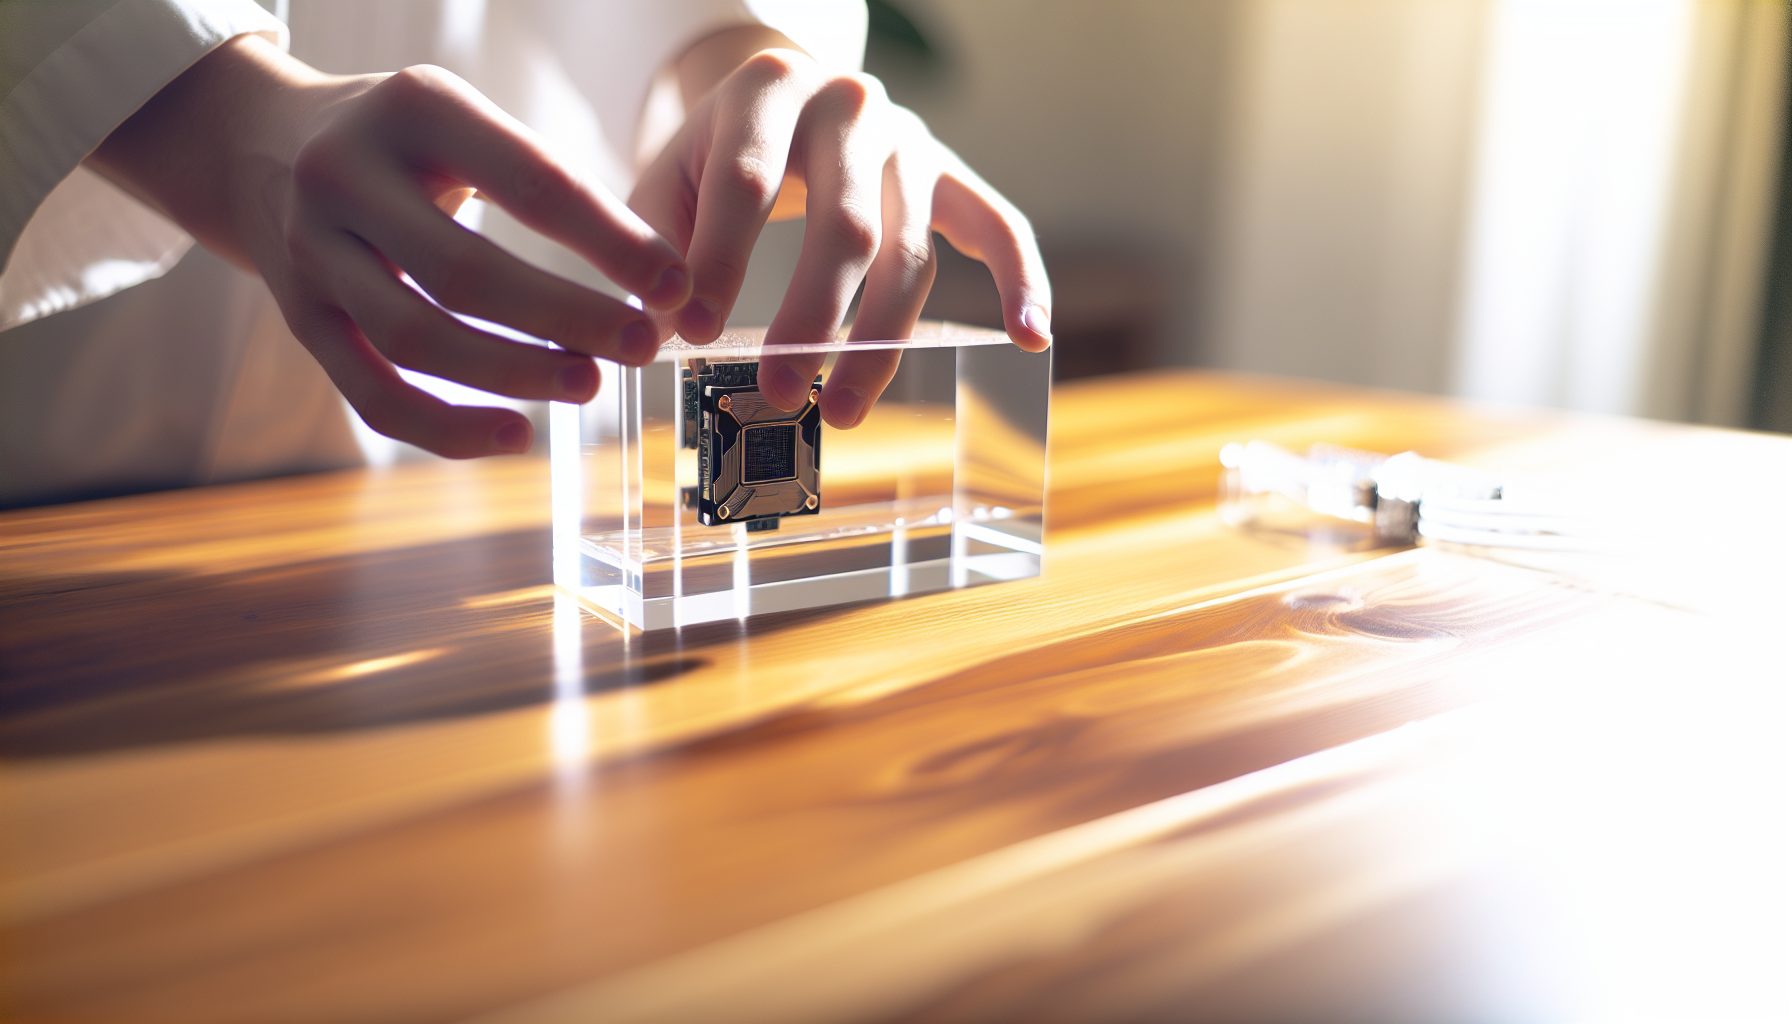
Immersion cooling means submerging your mining hardware completely in a non-conductive liquid. The liquid absorbs heat directly from the components, then you cool the liquid itself. No fans needed. The physics are straightforward: liquids transfer heat about 25 times more efficiently than air.
For solo miners running equipment at home, this solves two major problems:
- Noise: ASICs typically run at 75-85 dB because they need massive airflow. Immersion setups operate at 35-40 dB — quiet enough for a bedroom or home office.
- Heat management: A single Antminer KS7 dumps 3200W of heat into your room. That’s like running 32 old-school 100W light bulbs continuously. Immersion cooling lets you extract that heat more efficiently.
The downside? Initial cost and complexity. You’re looking at $500-2000 for a basic single-miner immersion setup, depending on whether you build or buy. Plus you need space for a tank, cooling equipment, and the liquid itself.
Quick math: If running your ASIC at home is costing you a divorce or complaints from neighbors, $1000 to fix the noise problem might actually be worth it.
Step 1: Understanding Dielectric Fluids for Mining Hardware
You cannot use regular water. Mining hardware runs on electricity, and water conducts electricity — that’s a fire waiting to happen. Instead, you need a dielectric fluid, which means it doesn’t conduct electricity.
There are three main types:
Mineral oil is the cheapest option at $3-5 per liter. Food-grade mineral oil works fine. The problems: it’s messy, degrades rubber and some plastics over time, and has a relatively low flash point around 200°C. For a single ASIC running at normal temperatures, mineral oil works okay.
Synthetic dielectric fluids like 3M Novec or BitCool are engineered specifically for electronics cooling. They don’t degrade components, have higher flash points, and better thermal properties. The cost is brutal: $50-100 per liter. For a tank that needs 40-60 liters, you’re spending $2000-6000 just on fluid.
Hydrocarbons sit in the middle — better than mineral oil, cheaper than specialty fluids. Around $15-25 per liter. Some miners use products designed for transformer cooling.
Here’s what the numbers say: For a beginner home setup with one or two ASICs, mineral oil makes sense financially. You’ll need roughly 40-60 liters depending on your tank size. That’s $120-300 for the fluid versus potentially thousands for synthetic options.
I tested mineral oil for six months before writing this. No component degradation so far, temperatures stay stable, and the cost doesn’t make you cry when you’re calculating your solo mining ROI.
Step 2: Choosing or Building Your Immersion Tank
You need a container that holds your ASIC, the cooling fluid, and ideally has some space for fluid circulation. The container must be chemically compatible with your chosen fluid and able to support the weight.
Your main options:
Commercial immersion mining tanks are specifically designed for this purpose. They include mounting brackets, cable management, and built-in cooling systems. Prices range from $800 for single-miner units to $3000+ for multi-miner setups. Companies like LiquidStack and Engineered Fluids sell these.
DIY builds using storage containers are what most home miners actually do. A 60-80 liter plastic storage container from a hardware store costs $30-50. You need to verify it’s compatible with your fluid — mineral oil can degrade some plastics. Polypropylene (PP) and high-density polyethylene (HDPE) generally work fine.
Aquarium tanks are another option. A 150-liter glass aquarium costs $100-200 and definitely won’t react with mineral oil. The downside is weight — 60 liters of mineral oil weighs about 50 kg, plus your ASIC at 10-15 kg. Make sure your floor and stand can handle it.
For our first build, Hugo and I used a 70-liter polypropylene storage container. Cost: $45. We drilled holes for power cables and added a basic mounting frame made from PVC pipe to keep the ASIC suspended in the fluid. Total construction cost under $100.
The container needs to be at least 20-30% larger than your submerged equipment to allow fluid circulation. An Antminer L7 is roughly 40cm x 20cm x 18cm. You need a tank that gives you space around all sides.
Tank Design Considerations
Think about access. You’ll need to get the ASIC in and out for maintenance. A top-loading design is simplest but means lifting a fluid-soaked 15kg ASIC out of the tank — it’s messy and heavy.
Cable management matters more than you’d think. You’re running power cables and network cables into a tank of fluid. The entry points need to be sealed well enough to prevent leaks but accessible enough to disconnect if needed. We used rubber grommets drilled into the side of our container.
Weight distribution is important. Mineral oil weighs about 0.85 kg per liter. A 60-liter tank means 51 kg of fluid plus your hardware. Put this setup on a sturdy table or shelf that can definitely handle 70+ kg.
Step 3: Setting Up Your Cooling System
The fluid absorbs heat from your ASIC, but now you need to cool the fluid itself. Otherwise the fluid temperature just keeps rising until your ASIC starts thermal throttling or shutting down.
You have two practical approaches for home setups:
External radiator with pump is the most common DIY solution. You circulate the hot fluid out of the tank through a radiator (like a car radiator or PC water-cooling radiator), cool it with fans, then return the cooled fluid to the tank. You need a submersible pump rated for your fluid type, tubing, and a radiator sized for your heat load.
Quick calculation: An ASIC pulling 3200W generates 3200W of heat. A typical 360mm PC radiator with three 120mm fans can dissipate roughly 500-700W. For a 3200W ASIC, you’d need 4-5 of those radiators. Or you get a larger automotive radiator — a standard car radiator can handle 15,000-20,000W of heat dissipation.
Heat exchanger to external cooling is more efficient but more complex. You use a heat exchanger to transfer heat from your dielectric fluid to a separate water loop, then cool the water. This works better at scale but adds cost and complexity.
For a single-miner home setup, I recommend starting with an external radiator approach. Here’s what you need:
- Submersible pump: 500-1000 liters per hour flow rate ($30-60)
- Radiator: Automotive radiator or multiple PC radiators ($50-150)
- Fans for the radiator: 120mm or 140mm PC fans ($10-15 each)
- Tubing: High-temperature silicone tubing ($20-40)
- Fittings and clamps ($20-30)
Total cooling system cost: $130-295 if you source parts yourself.
Standard car radiator with mounting brackets, handles high heat loads, costs less than multiple PC radiators. Pair with two or three 120mm fans for adequate cooling of a single ASIC.
Our setup uses a small automotive radiator ($75) with three 120mm fans ($35 total). The pump cost $45. We mounted everything on a simple wooden frame next to the tank. The fans on the radiator are definitely audible — maybe 45 dB — but that’s still way quieter than the ASIC’s original 75 dB fans.
Step 4: Preparing Your ASIC for Immersion
You cannot just drop your ASIC directly into fluid. Some preparation is required to avoid problems.
Remove the original fans. They’re unnecessary in immersion cooling and the motors aren’t designed to run submerged in oil. Unplug and remove all fan assemblies. Keep them in case you ever want to return to air cooling.
Check for components that might trap air. Air pockets can create hot spots. The hash boards themselves are usually fine, but some ASICs have plastic shrouds or covers that might trap air bubbles. We removed the plastic top cover from our L7.
Clean any dust or debris. You’re about to seal this equipment in fluid for months. Clean the hash boards with compressed air before immersion. Any dust in the system will end up floating in your fluid.
Consider thermal paste on chips. Some miners report better performance by applying fresh thermal paste to ASIC chips before immersion. The data on this is mixed — in most cases the direct fluid contact provides excellent cooling regardless. I didn’t bother with our setup and temperatures stayed well within spec.
Cable management planning. Figure out how your power cables and network cable will route from the ASIC to outside the tank. You want minimal cable length inside the fluid to reduce complexity. We zip-tied cables together and created a single exit point through a grommet on the tank side.
One warning: Some ASICs have small fans inside the power supply unit itself. These PSU fans might be separate from the main cooling fans. Check your specific model. In most cases you leave the PSU outside the tank anyway, but some miners do submerge the entire unit.
PSU Placement Choices
You have two options: submerge the PSU with the ASIC, or keep it external.
Keeping the PSU external is simpler for beginners. The PSU stays air-cooled outside the tank, you just run the power cables into the tank to the ASIC. This is what we did. The PSU fan still makes some noise (around 50 dB) but it’s way better than having the entire ASIC screaming at 75 dB.
Submerging the PSU gets you true silence but adds complexity. You need to verify your specific PSU model is safe to submerge, and you need to route AC power into the tank. Most home miners keep the PSU external for safety and simplicity.
Step 5: Assembly and Initial Testing
Now you actually put everything together. Take your time with this step — rushing leads to leaks and problems.
Mount the ASIC in the tank. You want the unit suspended in the fluid, not sitting on the bottom of the tank. We built a simple PVC frame that sits on the tank bottom and holds the ASIC elevated. This allows fluid circulation around all sides of the unit.
Route cables carefully. Thread your power and network cables through your exit grommet before mounting the ASIC. Leave enough slack inside the tank for the cables to move slightly but not so much that they create a tangled mess.
Install your pump and plumbing. The pump intake should be near the bottom of the tank (where hot fluid rises to). The return line from your radiator should feed cooler fluid back to the top or side of the tank. This creates circulation.
Fill with fluid slowly. Start adding your dielectric fluid. Pour slowly and watch for leaks at your cable entry points. Fill until the ASIC is completely submerged with about 5-10cm of fluid above the highest point of the hardware.
Look for air bubbles. As you fill, air will bubble out of various spaces in the ASIC. Tilt the tank gently if needed to help air escape. Large trapped air pockets can create cooling problems.
Check for leaks before power-on. Let everything sit for 30 minutes. Check all your cable entry points, pump connections, and radiator lines for leaks. Fix any problems before proceeding.
Power on and monitor closely. Connect power and network. Start the ASIC. Turn on your pump and radiator fans. Watch temperatures carefully for the first hour of operation.
Here’s what normal looks like: The ASIC should boot and start hashing immediately. You’ll hear the pump (quiet hum) and the radiator fans (moderate noise, maybe 45 dB). Fluid temperature will rise initially as the system reaches equilibrium. For mineral oil immersion cooling in a home environment, you want to see the fluid stabilize at 45-55°C for most ASICs.
If fluid temperature keeps rising past 60°C, your cooling system is undersized. Add more radiator capacity or more fans.
Step 6: Monitoring and Maintenance for Long-Term Operation
Your immersion cooling setup for solo mining at home isn’t maintenance-free. Here’s what you need to monitor and how often.
Fluid temperature: Check daily at first, then weekly once stable. Most ASICs are designed to operate up to 75-85°C on the chips themselves. In immersion cooling with good circulation, chip temps typically run 5-15°C above fluid temperature. So if your fluid is at 50°C, your chips might be at 60°C — well within safe limits.
Invest in a simple liquid thermometer or a digital temperature probe ($10-20) that you can read without opening the tank.
Fluid level: Check monthly. Mineral oil has low evaporation but some fluid loss happens over time, especially if your tank isn’t perfectly sealed. Top up as needed.
Fluid condition: Every 3-6 months, look at the fluid color and clarity. Fresh mineral oil is clear and slightly amber. If it starts getting dark or cloudy, that indicates breakdown or contamination. You might need to replace it after 12-18 months of continuous use.
Pump operation: Make sure your circulation pump keeps running. If the pump fails, your fluid stops circulating and hot spots develop quickly. Some miners add a pump monitoring system that alerts them if flow stops.
Hash rate stability: Monitor your actual mining performance. If you’re solo mining something like Kaspa with an IceRiver KS3 in immersion, your hash rate should stay rock solid. Any drops might indicate thermal issues or hardware problems.
We do a full inspection every three months: drain some fluid to check for debris, clean the pump filter, verify all connections are tight, and check the ASIC for any signs of component degradation.
One thing I learned: Keep a spare pump on hand. When your circulation pump dies at 2 AM and your fluid temperature is climbing, you can’t wait for Amazon shipping. A backup pump costs $40 and saves you from emergency shutdowns.
Real Costs: What Immersion Cooling Actually Costs for Solo Miners
Let’s look at real numbers for a single-ASIC home immersion setup:
Initial setup costs:
- Storage container/tank: $45-200
- Dielectric fluid (60 liters): $120-300 (mineral oil) or $3000-6000 (synthetic)
- Cooling system (pump, radiator, fans, tubing): $130-295
- Miscellaneous (mounting materials, grommets, fittings): $50-80
Total DIY setup: $345-875 using mineral oil
Commercial turnkey systems start around $1500 for single-miner units.
Operating costs:
The pump and radiator fans add to your power consumption. A typical setup pulls an extra 40-80W continuously. At $0.12/kWh, that’s an additional $4.20-8.40 per month in electricity.
Compare this to traditional noise reduction approaches: A soundproof box with proper ventilation might cost $200-400 in materials and still doesn’t eliminate noise completely. If immersion cooling costs $600 and actually solves the noise problem, the math makes sense for many home solo miners.
The real question: Does solving the noise problem enable you to run more or better mining hardware at home? If immersion cooling lets you run an Antminer L7 in your house where you couldn’t before, you’re not comparing $600 against nothing — you’re comparing it against the alternative of not being able to solo mine at all.
Immersion Cooling for Different Mining Hardware
Not all mining equipment benefits equally from immersion cooling.
ASICs: Best candidates for immersion. They generate huge amounts of heat in a compact space and normally need massive airflow. Models like the Antminer L7, Antminer KS7, or Antminer L7 benefit tremendously. The noise reduction alone justifies the setup cost for home environments.
GPU rigs: Can work in immersion but less common for solo miners. The challenge is that GPU rigs have multiple cards, risers, and a motherboard — more complex to immerse properly. Plus, modern GPUs with good air cooling already run reasonably quiet. Unless you’re running 6+ GPUs for GPU solo mining, the cost/benefit of immersion doesn’t make sense.
Small lottery miners: Things like Bitaxe or NerdMiner V2 are already quiet and low-power. Immersion cooling is complete overkill. Don’t bother.
FPGA miners: Good candidates if you’re running multiple high-power FPGAs. Similar benefits to ASICs. But most home FPGA solo mining setups use lower-power boards that don’t need immersion.
For solo miners specifically, immersion makes most sense when you’re running one or more high-power ASICs at home and noise is your limiting factor. The math changes if you’re in a garage or basement where noise doesn’t matter — in that case, air cooling with proper power and ventilation is simpler and cheaper.
Safety Considerations and Honest Warnings
Immersion cooling is generally safe when done properly, but there are real risks to know about.
Electrical safety: Dielectric fluids don’t conduct electricity, but your power connections definitely do. All power connections must be outside the fluid or properly sealed. Any exposed wire terminals in contact with even dielectric fluid can potentially create problems over time as fluid degrades or contamination occurs. Keep all high-voltage connections external.
Fire safety: Mineral oil is flammable. Flash point is around 200°C, so normal operation at 50°C is nowhere close to danger levels. But if a component fails catastrophically and creates a hot spot, there is theoretical fire risk. Keep a fire extinguisher rated for electrical and oil fires nearby. Don’t set up immersion cooling in a space with poor fire safety.
Fluid spills: Mineral oil is slippery and messy. When you eventually need to remove your ASIC for maintenance, it will be dripping with oil. Have old towels, a large drip tray, and a plan for where you’ll work on the fluid-soaked equipment. Our first maintenance session created an oil puddle on the garage floor that took an hour to clean up properly.
Weight: I mentioned this already but it’s worth repeating. 60 liters of fluid plus hardware equals 70+ kg. Make absolutely sure your furniture and floor can handle this. We did not check this carefully enough and had to reinforce the shelf our tank sits on after it started bowing under the weight.
Degradation of components: Long-term exposure to mineral oil can degrade some rubber seals, certain plastics, and thermal pads on components. Most miners report no issues over 1-2 years, but this isn’t a 5-year tested solution for most equipment. You’re taking a small risk that long-term fluid exposure might damage something.
The honest warning: Immersion cooling is still a niche approach. You’re essentially experimenting with your mining hardware. If you’re running expensive ASICs and counting on them for solo mining attempts, make sure you’re comfortable with the risks before submerging them in fluid. Start with cheaper or older equipment if possible to learn the process.
Is Immersion Cooling Worth It for Your Solo Mining Setup?
Here’s my honest assessment after running our setup for months:
Immersion cooling makes sense if noise is genuinely preventing you from running mining hardware at home. If you live in an apartment, have roommates, or family members who can’t tolerate ASIC noise, the $600-800 investment in a DIY immersion system is reasonable. The alternative is either not mining at all or renting space elsewhere — both of which cost more.
Immersion cooling probably doesn’t make sense if you already have a garage, basement, or shed where ASIC noise isn’t a problem. Air cooling is simpler, cheaper, and easier to maintain. The complexity of managing fluid, pumps, and radiators only makes sense when you’re getting something meaningful in return.
The performance benefits are real but modest. Our L7 runs about 5-8°C cooler in immersion versus air cooling, which might translate to slightly better chip longevity and maybe 2-3% better efficiency. That’s nice but not enough to justify the cost on its own.
For solo miners specifically, the calculation looks like this: If you’re solo mining Scrypt coins with merged mining, you probably want to run your ASIC 24/7 for maximum block-finding chances. If noise forces you to shut down at night or on weekends, you’re cutting your odds significantly. In that case, immersion cooling has real value because it lets you run continuously.
The data shows that consistent uptime matters more for solo mining success than small efficiency improvements. An ASIC running 24/7 at 98% efficiency beats an ASIC running 12 hours per day at 100% efficiency.
Secure Your Winnings
Finding a solo block means receiving 3.125 BTC directly to your wallet — currently worth over $250,000. That amount should never sit on an exchange.
Two hardware wallets we recommend for solo miners:
Ledger Nano X (~$149) — Industry standard, supports BTC natively
Buy Ledger Nano X
Trezor Model T (~$179) — Open-source firmware, strong community trust
Buy Trezor Model T
Frequently Asked Questions
Can I use regular mineral oil from a pharmacy for immersion cooling?
Yes, food-grade or pharmaceutical-grade mineral oil works fine for ASIC immersion cooling. It’s the same basic substance as specialty “electronics cooling oil” but costs a fraction of the price. Avoid mineral oil with additives (like scented versions) and make sure it’s pure mineral oil. We used food-grade mineral oil from a restaurant supply company at $3.50 per liter.
How often do I need to change the immersion fluid?
Mineral oil typically lasts 12-18 months before it starts degrading visibly (darkening, increased viscosity). Synthetic dielectric fluids can last 3-5 years or more. Check your fluid every few months — when it starts looking dark or cloudy, plan to replace it. Some miners filter and recirculate their fluid to extend its life, but for small home setups it’s usually easier to do a full replacement every 12-18 months.
Will immersion cooling void my ASIC warranty?
Almost certainly yes. Most manufacturers explicitly void warranty if you modify cooling systems or operate equipment outside of specified conditions. Immersion cooling definitely falls into “modified operation”. Only do this with equipment you own outright and are comfortable potentially losing warranty coverage on. We did this with a used L7 that was already out of warranty anyway.
Can I immersion cool multiple ASICs in one tank?
Yes, but you need to scale your cooling system appropriately. Each ASIC adds its heat load to the system. Two 3200W ASICs mean 6400W of heat to dissipate. Your radiator capacity and fluid circulation need to handle the total heat load. You also need a much larger tank — for two ASICs you’re looking at 120-150 liters of fluid minimum. The complexity and cost increase significantly with multiple miners in one tank.
Does immersion cooling improve my chances of finding a solo mining block?
Not directly. Immersion cooling doesn’t increase your hash rate (maybe 2-3% from slightly better cooling efficiency, but that’s marginal). What it does is enable you to run your hardware consistently in environments where you otherwise couldn’t due to noise. The indirect benefit is higher uptime — if immersion cooling lets you run 24/7 instead of 12 hours per day, your block-finding odds double. That’s the real value for solo miners.