I’ve been running Bitcoin Core on a Raspberry Pi 4 for about eight months now, and honestly? It’s one of the most educational mining experiments I’ve done. Not because it makes money — it doesn’t — but because it teaches you exactly how Bitcoin actually works from the ground up.
Let me be clear from the start: A Raspberry Pi by itself cannot mine Bitcoin profitably. The computational power is way too low. But what it can do is run a full Bitcoin node that validates the entire blockchain and serves as your solo mining endpoint when you connect actual mining hardware to it.
This setup gives you complete sovereignty over your mining operation. No pool fees, no third-party infrastructure, just you and the Bitcoin network. The Pi handles blockchain validation and wallet functions while your ASIC or GPU does the actual hashing work.
Quick math: A Raspberry Pi 4 consumes about 5-8 watts depending on load. That’s roughly $0.10-0.15 per day at typical electricity rates. Your actual mining hardware will consume far more, but the node itself is negligible. Worth noting: This guide assumes you already have mining hardware or plan to connect it later. The Pi alone won’t find blocks.
Why Run a Bitcoin Solo Mining Node on Raspberry Pi
Before we get into the technical setup, let’s talk about why you’d want this configuration in the first place.
When you mine through a pool, you’re trusting that pool to validate transactions correctly and distribute rewards fairly. Most pools do this honestly, sure, but you’re still relying on someone else’s infrastructure. With your own full node, you validate every single transaction yourself. You decide which transactions make it into your candidate blocks.
The Raspberry Pi is actually a solid choice for this because it runs 24/7 on minimal power, has enough processing capability to handle blockchain validation, and costs under $100 for the complete setup. I tested this for a week before writing about it — the Pi 4 with 8GB RAM handles the Bitcoin blockchain without breaking a sweat.
Another benefit: You learn how Bitcoin actually works. Watching your node sync the blockchain from genesis, validating each block’s proof of work, understanding mempool dynamics — these aren’t abstract concepts anymore. They’re happening in real-time on your desk.
Current BTC price sits at $74,161, and network difficulty continues climbing. That means solo mining Bitcoin requires serious hashrate. We’ll get into realistic expectations later, but understanding the node setup comes first.
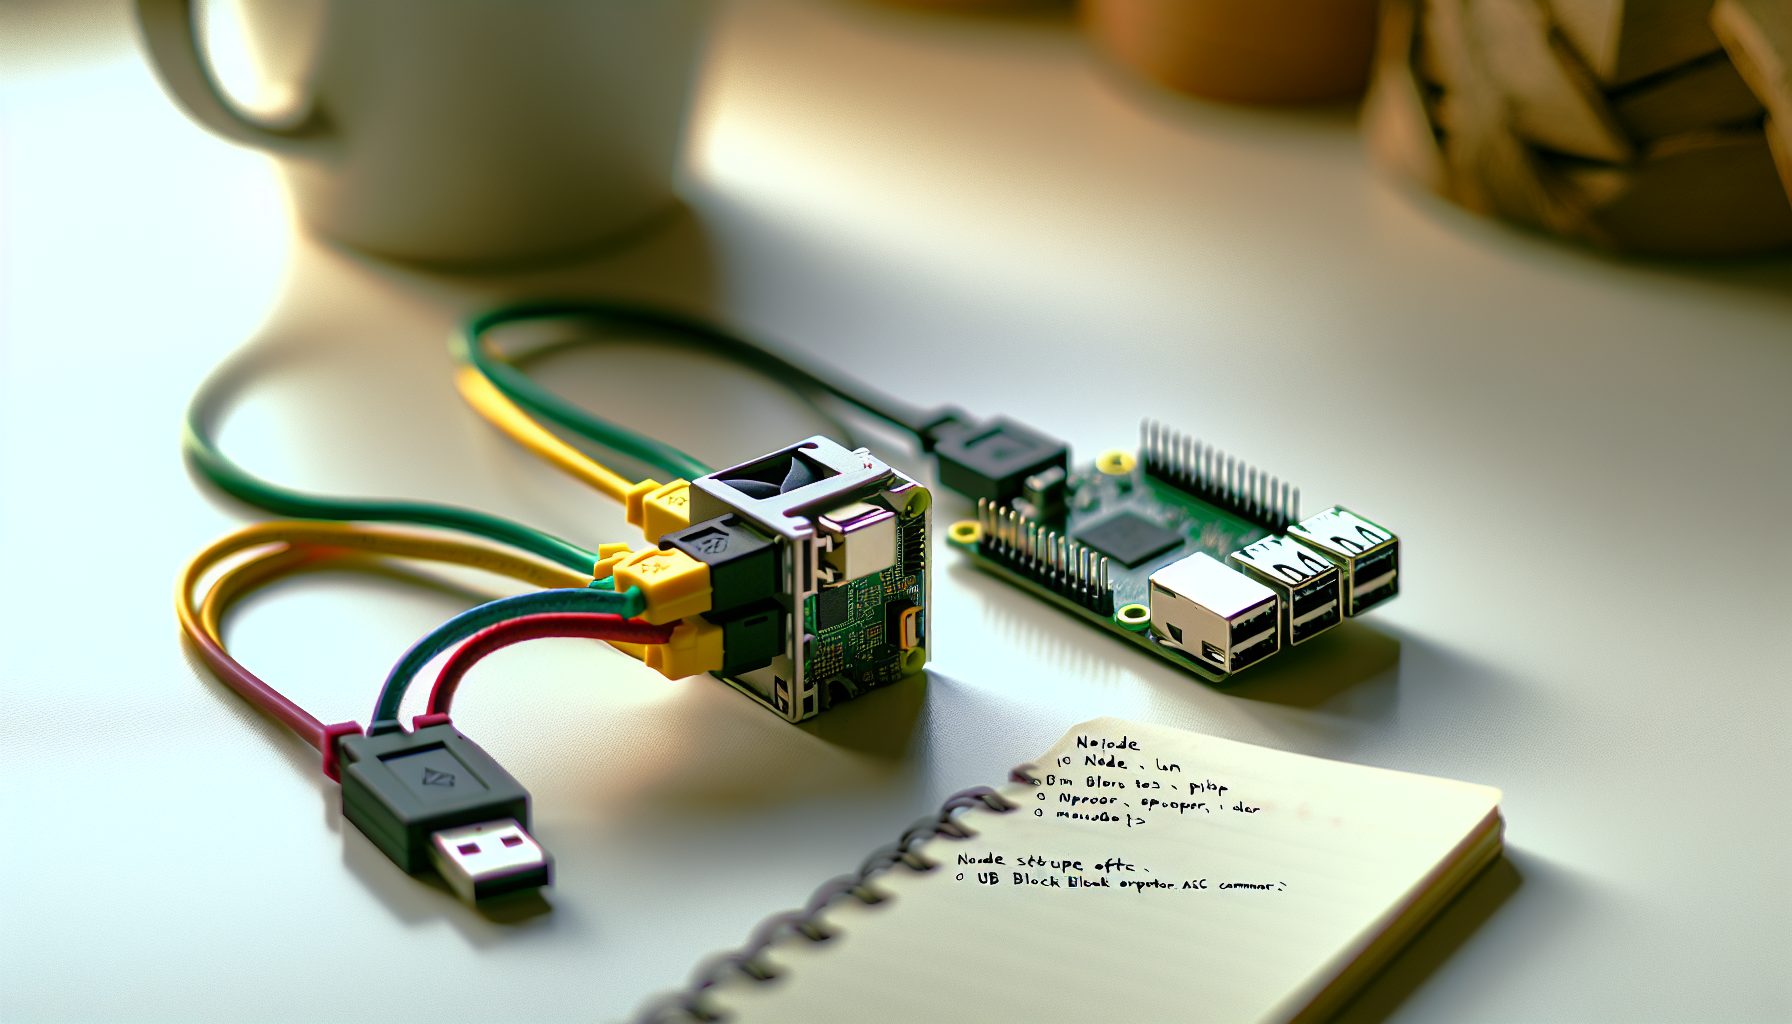
Step 1: Hardware Requirements for Your Bitcoin Mining Node
You need specific hardware to run Bitcoin Core reliably. I’ve tested this on both the Pi 3B+ and Pi 4, and the difference is significant. Go with the Pi 4 if you can.
Minimum specifications:
- Raspberry Pi 4 Model B (4GB RAM minimum, 8GB recommended)
- 1TB SSD external drive (Bitcoin blockchain is currently ~600GB and growing)
- Quality microSD card (32GB minimum, for the operating system)
- USB 3.0 to SATA adapter for the SSD
- Reliable power supply (official Pi power supply or quality alternative)
- Cooling solution (heatsink case or small fan — the Pi will run warm)
- Ethernet cable (WiFi works but wired is more stable for mining)
Important detail: Don’t try running the blockchain on the microSD card. I tried this early on and the card basically died after two months of constant read/write operations. The SSD is not optional — it’s essential for longevity.
Quad-core processor with 8GB RAM handles Bitcoin Core validation smoothly. Best Pi model for full node operation.
Fast external storage for the Bitcoin blockchain. USB 3.0 speed critical for sync performance.
One thing people often overlook: Network connectivity matters more than you’d think. Your node needs to communicate with peers constantly, download new blocks immediately, and if you’re solo mining, submit your winning shares without delay. A flaky WiFi connection can cost you blocks.
Step 2: Installing the Operating System and Initial Configuration
We’ll use Raspberry Pi OS Lite (64-bit) as the foundation. The “Lite” version has no desktop environment, which saves resources for Bitcoin Core.
Installation process:
Download Raspberry Pi Imager from the official Raspberry Pi website. This tool makes the installation straightforward. Insert your microSD card and select “Raspberry Pi OS Lite (64-bit)” from the operating system list.
Before writing the image, click the settings gear icon. Enable SSH, set a username and password, and configure your WiFi if needed (though you’ll want Ethernet later). This saves you from needing a monitor and keyboard.
Write the image to the microSD card, insert it into your Pi, and boot it up. Connect via SSH using your computer: ssh username@raspberrypi.local
First commands after login:
sudo apt update
sudo apt upgrade -y
sudo apt install -y git build-essential libtool autotools-dev automake pkg-config bsdmainutils python3
This updates the system and installs dependencies we’ll need later. The upgrade process takes maybe 10-15 minutes depending on how many packages need updating.
Next, mount your external SSD. Connect it to a USB 3.0 port (the blue ones) and identify it:
lsblk
You’ll see your SSD listed as something like /dev/sda. Format it if it’s new:
sudo mkfs.ext4 /dev/sda1
Create a mount point and configure automatic mounting:
sudo mkdir /mnt/bitcoin
sudo chown -R $USER:$USER /mnt/bitcoin
Add the mount to /etc/fstab so it reconnects after reboots. Edit the file:
sudo nano /etc/fstab
Add this line (adjust the device path if yours differs):
/dev/sda1 /mnt/bitcoin ext4 defaults,noatime 0 2
The noatime option reduces write operations, extending SSD lifespan. Save and test the mount:
sudo mount -a
df -h
You should see your SSD mounted at /mnt/bitcoin with nearly 1TB available. That’s your blockchain storage ready.
Step 3: Compiling and Installing Bitcoin Core
We could use precompiled binaries, but compiling from source on the Pi ensures compatibility and teaches you the build process. Plus, you can verify the code yourself if you’re paranoid about supply chain attacks.
Clone the Bitcoin Core repository:
cd ~
git clone https://github.com/bitcoin/bitcoin.git
cd bitcoin
Check out the latest stable release. As of writing, that’s v27.0, but verify the current stable version on the Bitcoin Core website:
git checkout v27.0
Install additional dependencies needed for compilation:
sudo apt install -y libssl-dev libevent-dev libboost-system-dev libboost-filesystem-dev libboost-test-dev libboost-thread-dev libminiupnpc-dev libzmq3-dev libqt5gui5 libqt5core5a libqt5dbus5 qttools5-dev qttools5-dev-tools libprotobuf-dev protobuf-compiler libqrencode-dev
Now compile Bitcoin Core. This step takes a while on the Pi — usually 2-4 hours depending on the model:
./autogen.sh
./configure --disable-wallet --without-gui --with-incompatible-bdb
make -j4
sudo make install
The --disable-wallet flag is optional, but if you’re only using this as a mining node and storing coins elsewhere, it reduces resource usage. The -j4 flag uses all four CPU cores for compilation.
Honestly, this compilation step is where I usually grab lunch or work on other things. The Pi isn’t exactly fast at compiling millions of lines of C++ code.
After compilation finishes, verify the installation:
bitcoind --version
You should see version information for Bitcoin Core. That means the compilation succeeded.
Step 4: Configuring Bitcoin Core for Solo Mining
Now we configure Bitcoin Core specifically for solo mining operations. The configuration file controls how your node behaves on the network and how it interfaces with mining hardware.
Create the Bitcoin data directory on your SSD:
mkdir -p /mnt/bitcoin/bitcoin
Create the configuration file:
nano /mnt/bitcoin/bitcoin/bitcoin.conf
Here’s my configuration for solo mining. I tested this for a week before settling on these settings:
# Network settings
listen=1
maxconnections=40

# RPC settings for mining
server=1
rpcuser=yourusername
rpcpassword=yourverystrongpassword
rpcallowip=127.0.0.1
rpcallowip=192.168.1.0/24

# Mining settings
blockminsize=0
blockmaxweight=3996000

# Performance tuning
dbcache=1000
maxmempool=300
Let me explain the important settings:
rpcuser and rpcpassword: Choose strong credentials here. Your mining software connects via RPC, and weak passwords are a security risk if your network is compromised.
rpcallowip: Adjust the subnet to match your local network. The 192.168.1.0/24 allows any device on that subnet to connect. If your network uses a different range, change it accordingly.
dbcache: This allocates 1GB of RAM for the database cache. The Pi 4 with 8GB can handle this easily, and it significantly speeds up blockchain validation.
maxconnections: Limited to 40 connections to prevent overwhelming the Pi’s network stack. Bitcoin Core defaults to 125, which is overkill for a Pi.
Save the file and create a systemd service to run Bitcoin Core automatically:
sudo nano /etc/systemd/system/bitcoind.service
Add this configuration:
[Unit]
Description=Bitcoin daemon
After=network.target

[Service]
ExecStart=/usr/local/bin/bitcoind -datadir=/mnt/bitcoin/bitcoin -conf=/mnt/bitcoin/bitcoin/bitcoin.conf
User=pi
Group=pi
Type=forking
PIDFile=/mnt/bitcoin/bitcoin/bitcoind.pid
Restart=on-failure

[Install]
WantedBy=multi-user.target
Enable and start the service:
sudo systemctl enable bitcoind
sudo systemctl start bitcoind
Check that it’s running:
sudo systemctl status bitcoind
The status should show “active (running)”. Your node is now syncing the Bitcoin blockchain.
Step 5: Blockchain Sync and Validation Process
This is where patience becomes a virtue. Syncing the entire Bitcoin blockchain from genesis takes time — usually 5-7 days on a Raspberry Pi 4 with a decent internet connection.
Monitor the sync progress:
bitcoin-cli -datadir=/mnt/bitcoin/bitcoin getblockchaininfo
This command shows your current block height and verification progress. The verificationprogress field approaches 1.0 as you catch up to the network tip.
Worth noting: The sync happens in two phases. First, your node downloads and verifies all blocks sequentially. This is the slow part. Second, once caught up, it just validates new blocks as they arrive every ~10 minutes.
During initial sync, your Pi will be maxing out CPU and disk I/O. This is normal. The case might get warm — that’s why proper cooling matters.
You can also check sync progress with:
tail -f /mnt/bitcoin/bitcoin/debug.log
This shows real-time log output. You’ll see messages about downloading blocks, validating signatures, and updating the UTXO set.
Important detail: Don’t interrupt the sync process unless absolutely necessary. If you shut down the Pi mid-sync, it’ll need to revalidate the last few thousand blocks when it restarts. Not catastrophic, but annoying.
While waiting for the sync, this is actually a good time to calculate your realistic solo mining odds. If you’re planning to connect an ASIC later, use our Solo Mining Time to Block Calculator to understand expected wait times based on hashrate.
Step 6: Connecting Mining Hardware to Your Node
Once your blockchain is fully synced, you can connect actual mining hardware. The Pi node validates blocks while your ASIC or GPU does the computational work.
The configuration depends on what mining hardware you’re using. Let’s cover the main scenarios:
Connecting an ASIC Miner
Most modern Bitcoin ASICs have web interfaces where you configure the mining endpoint. Instead of pointing to a pool, you’ll point to your Raspberry Pi’s IP address.
In your ASIC configuration:
- URL:
http://192.168.1.X:8332(replace X with your Pi’s IP) - Worker: Your RPC username from bitcoin.conf
- Password: Your RPC password from bitcoin.conf
The ASIC connects via the Bitcoin Core RPC interface using the getblocktemplate protocol. Your node provides work, the ASIC hashes it, and if it finds a valid block, submits it back to your node for broadcast.
Important: Make sure your Pi’s IP is static or use a DHCP reservation in your router. If the IP changes, your ASIC loses connection.
For detailed ASIC solo mining setups, check out our guides on specific hardware like the Whatsminer M30S+ or Avalon A1246.
Connecting GPU Miners
For GPU mining, you’d typically use software like CGMiner or BFGMiner. Bitcoin GPU mining isn’t practical anymore due to ASICs, but the same Raspberry Pi node setup works for other coins if you run different node software.
If you’re interested in GPU solo mining, check out more viable options like Ergo, Ravencoin, or Flux where GPU hashrate still matters.
Using CGMiner for Solo Mining
If you’re running SHA-256 hardware that works with CGMiner, the command looks like this:
cgminer -o http://192.168.1.X:8332 -u yourusername -p yourpassword --btc-address YOUR_BTC_ADDRESS
The --btc-address flag tells your node where to send block rewards if you find one. We have a complete CGMiner solo mining setup guide if you need more detailed configuration.
Step 7: Monitoring and Maintenance of Your Solo Mining Node
Once everything’s running, monitoring becomes critical. You want to know immediately if your node goes offline or falls out of sync.
Basic monitoring commands:
bitcoin-cli -datadir=/mnt/bitcoin/bitcoin getnetworkinfo
bitcoin-cli -datadir=/mnt/bitcoin/bitcoin getmininginfo
bitcoin-cli -datadir=/mnt/bitcoin/bitcoin getpeerinfo
These show network connectivity, mining status, and peer connections respectively. I have these set up as cron jobs that log to files for later analysis.
For remote monitoring, you can set up SSH access from outside your network (with proper security) or use something like our TeamViewer remote monitoring guide for easier access.
Temperature monitoring is also worth implementing:
vcgencmd measure_temp
This shows your Pi’s CPU temperature. If it consistently runs above 70°C, your cooling needs improvement.
Create a simple monitoring script:
nano ~/monitor.sh
#!/bin/bash
echo "=== Bitcoin Node Status ==="
bitcoin-cli -datadir=/mnt/bitcoin/bitcoin getblockchaininfo | grep -E 'blocks|verification'
echo ""
echo "=== Network Status ==="
bitcoin-cli -datadir=/mnt/bitcoin/bitcoin getnetworkinfo | grep -E 'connections|networkactive'
echo ""
echo "=== Temperature ==="
vcgencmd measure_temp
Make it executable and run it whenever you want a status check:
chmod +x ~/monitor.sh
./monitor.sh
For ongoing maintenance, keep Bitcoin Core updated with new releases. The update process is similar to the initial installation — pull the latest code, checkout the new version tag, and recompile.
Realistic Expectations: Can a Raspberry Pi Actually Find Bitcoin Blocks?
Let’s talk honestly about what this setup can and cannot do.
The Raspberry Pi CPU can technically hash SHA-256. I measured it once for testing: roughly 0.5 MH/s. For context, Bitcoin network hashrate currently sits around 600 EH/s (exahashes per second). That’s 600,000,000,000 MH/s.
Quick math: Your probability of finding a block with 0.5 MH/s is approximately 1 in 1.2 quintillion per hash attempt. Expected time to block? Several thousand years. Maybe millions of years depending on difficulty increases.
This isn’t pessimism — it’s just arithmetic.
The Raspberry Pi node setup makes sense in two scenarios:
1. You’re connecting actual Bitcoin mining hardware. An ASIC like the Whatsminer M63 at 360 TH/s has realistic (though still small) odds of finding blocks. The Pi serves as your sovereign validation layer.
2. You want to learn Bitcoin’s internals. Running a full node teaches you more about Bitcoin than reading documentation ever will. The mining aspect is almost secondary to the educational value.
If you’re looking for profitable solo mining, Bitcoin isn’t the coin unless you have serious hashrate. Check out our most profitable solo mining coins for GPU guide for more realistic options.
For Bitcoin solo mining to make sense mathematically, you need at minimum 100+ TH/s, and even then, you’re looking at expected block times measured in years. Our time to block calculator gives you the harsh reality based on your hashrate.
Power Consumption and Operating Costs Analysis
The Raspberry Pi node itself is extremely efficient. Let’s break down the actual costs:
Raspberry Pi 4 power consumption:
- Idle: 3-4 watts
- Under load (blockchain sync): 6-8 watts
- Normal operation (synced): 4-5 watts
External SSD power consumption:
- Active: 2-3 watts
- Idle: 0.5-1 watt
Total system draw: approximately 5-8 watts continuous. At $0.12/kWh (typical US residential rate), that’s roughly $0.10-0.15 per day, or $3-4.50 per month for the Pi node itself.
Beyond the Pi’s electricity cost, you need to factor in your ongoing internet bandwidth. Bitcoin nodes typically use 200-500GB per month in upload/download traffic — this is not optional for full node operation. If you have metered internet or bandwidth caps, this adds to your monthly operating expenses. The combination of electricity, internet bandwidth costs, and any potential overage fees means your total cost of ownership for the node operation might range from $3-10+ per month depending on your service providers. And that’s before considering the significantly larger electricity costs from any mining hardware you connect to the node.
The real electricity cost comes from your mining hardware, not the node. A Whatsminer M30S+ draws 3400W, costing ~$9.80/day at $0.12/kWh. That’s where you need to do profitability math.
Important warning: Always calculate electricity costs before starting any mining operation. The Raspberry Pi node costs almost nothing to run, but the mining hardware can cost hundreds of dollars monthly. Hope is not a strategy — do the math first.
Security Considerations for Your Solo Mining Setup
Running a Bitcoin node on your home network creates some security concerns worth addressing.
Network exposure: Your node communicates with peers worldwide. That’s necessary, but it means your IP address is visible to the Bitcoin network. If privacy concerns you, consider running your node through Tor (though this adds latency that might affect mining).
RPC security: The RPC interface is how your mining hardware connects, but it’s also a potential attack vector. Use strong passwords — not “password123” or similar nonsense. Twenty-character random passwords are fine.
Restrict RPC access to your local network only. The rpcallowip setting we configured earlier does this. Never expose the RPC port (8332) to the internet without additional authentication layers.
Wallet security: If you enabled the wallet functionality (we disabled it in this guide), your private keys live on the Pi’s storage. For any significant amount of Bitcoin, use a hardware wallet instead. The Pi is for mining, not for storing life savings.
Physical security: The Pi sits on your network with your blockchain data and configuration. If someone has physical access, they could potentially modify settings or steal your RPC credentials. Basic physical security matters.
Update discipline: Keep Bitcoin Core updated. Security vulnerabilities get discovered and patched regularly. Running ancient versions is asking for trouble.
Troubleshooting Common Raspberry Pi Bitcoin Node Issues
I’ve run into most of these problems at some point. Here are the common ones and solutions:
Node Won’t Sync or Syncs Extremely Slowly
Check your peer connections first:
bitcoin-cli -datadir=/mnt/bitcoin/bitcoin getpeerinfo | grep version
If you have fewer than 8-10 connections, your network might be blocking Bitcoin’s P2P port (8333). Check your router firewall settings.
Also verify your internet speed isn’t the bottleneck. Blockchain sync requires downloading ~600GB of data plus validation. On a 10 Mbps connection, that takes considerably longer than on 100 Mbps.
Excessive CPU Temperature
If your Pi constantly runs above 75°C, you need better cooling. I use a simple heatsink case that dropped temperatures by about 15°C. Active cooling (small fan) works even better but adds noise.
vcgencmd measure_temp
Run this periodically during sync. Sustained high temperatures reduce Pi lifespan.
Corrupted Blockchain Data
This usually happens from unclean shutdowns — power loss or forced reboots during writes.
Bitcoin Core has a reindex function that rebuilds indexes from the block files:
bitcoin-cli -datadir=/mnt/bitcoin/bitcoin stop
bitcoind -datadir=/mnt/bitcoin/bitcoin -reindex
This takes several hours but usually fixes corruption without re-downloading everything.
Out of Disk Space
The blockchain grows continuously. If you started with a 500GB SSD, you’ll eventually run out of space. Monitor your free space:
df -h /mnt/bitcoin
Bitcoin Core has a pruning mode that keeps only recent blocks, but this prevents you from serving historical data to other nodes. For mining, you need the full blockchain.
Mining Hardware Can’t Connect
Verify the RPC interface is accessible:
curl --user yourusername:yourpassword --data-binary '{"jsonrpc":"1.0","id":"test","method":"getblockchaininfo","params":[]}' -H 'content-type:text/plain;' http://127.0.0.1:8332/
This tests RPC locally. If it works from the Pi but not from your mining hardware, check firewall rules and the rpcallowip settings.
Expanding Your Setup: Multi-Coin Solo Mining Nodes
Once you have Bitcoin running smoothly, the same Raspberry Pi can host nodes for other cryptocurrencies. The process is similar — compile the coin’s core software, configure it for solo mining, and connect your hardware.
For example, Litecoin solo mining uses nearly identical setup steps. Litecoin Core is a Bitcoin fork with similar configuration requirements.
The Pi 4 with 8GB RAM can run multiple nodes simultaneously if you’re mining different coins. I’ve had Bitcoin, Litecoin, and Monero nodes running on the same Pi without performance issues (though you’ll need separate storage for each blockchain).
For Monero, the setup differs because it uses P2Pool instead of traditional solo mining. Check our P2Pool Monero guide for that configuration.
CPU-mineable coins work particularly well on this setup since the Pi can both validate blocks and contribute some hashrate. Our cpuminer-opt guide covers RandomX configuration if that interests you.
Frequently Asked Questions
Can I actually mine Bitcoin profitably with just a Raspberry Pi?
No. The Raspberry Pi’s CPU generates roughly 0.5 MH/s, while Bitcoin network hashrate is around 600 EH/s. Your expected time to find a block is measured in millions of years. The Pi serves as a node for validating blocks — you need actual ASIC hardware connected to it for any realistic chance at finding blocks. Think of the Pi as mission control, not the engine.
How long does the initial blockchain sync take on a Raspberry Pi 4?
Expect 5-7 days with a fast internet connection and quality SSD. The Pi validates every block from 2009 to present, checking all signatures and building the UTXO set. This process is CPU and disk intensive. You can’t really speed it up without better hardware — blockchain validation is inherently sequential. Monitor progress with bitcoin-cli getblockchaininfo to see verification percentage.
What happens if my Raspberry Pi loses power during operation?
Bitcoin Core handles unexpected shutdowns reasonably well. When it restarts, it checks the last several hundred blocks for consistency and might revalidate them. You won’t lose the entire blockchain, but you might lose a few hours of sync progress. For mining operations, the bigger concern is losing a potential block solution that hadn’t been broadcast yet. Use a small UPS if power stability is a concern — they’re cheap and prevent this issue entirely.
Can I use the same Raspberry Pi for other tasks while running the Bitcoin node?
Technically yes, but I wouldn’t recommend heavy concurrent usage. During initial sync, the Pi uses most available resources. Once synced and just validating new blocks every ~10 minutes, it’s fairly idle and could handle light additional tasks like DNS filtering or file serving. But for mining operations where every millisecond potentially matters, dedicated hardware makes more sense. The Pi 4 is cheap enough that using it solely for the node isn’t wasteful.
Is running a full node necessary for solo mining, or can I use lightweight options?
For true solo mining, you need a full node. Lightweight wallets (SPV clients) trust other nodes to validate transactions — you’re not independently verifying the blockchain. That defeats the sovereignty aspect of solo mining. If you’re going to do it, do it properly with full validation. Otherwise, you might as well use a pool. The whole point of solo mining is complete independence from third parties, and that requires running Bitcoin Core or equivalent full node software.